
Ombre Nails: 30 Gradient Ideas and How to Do Them
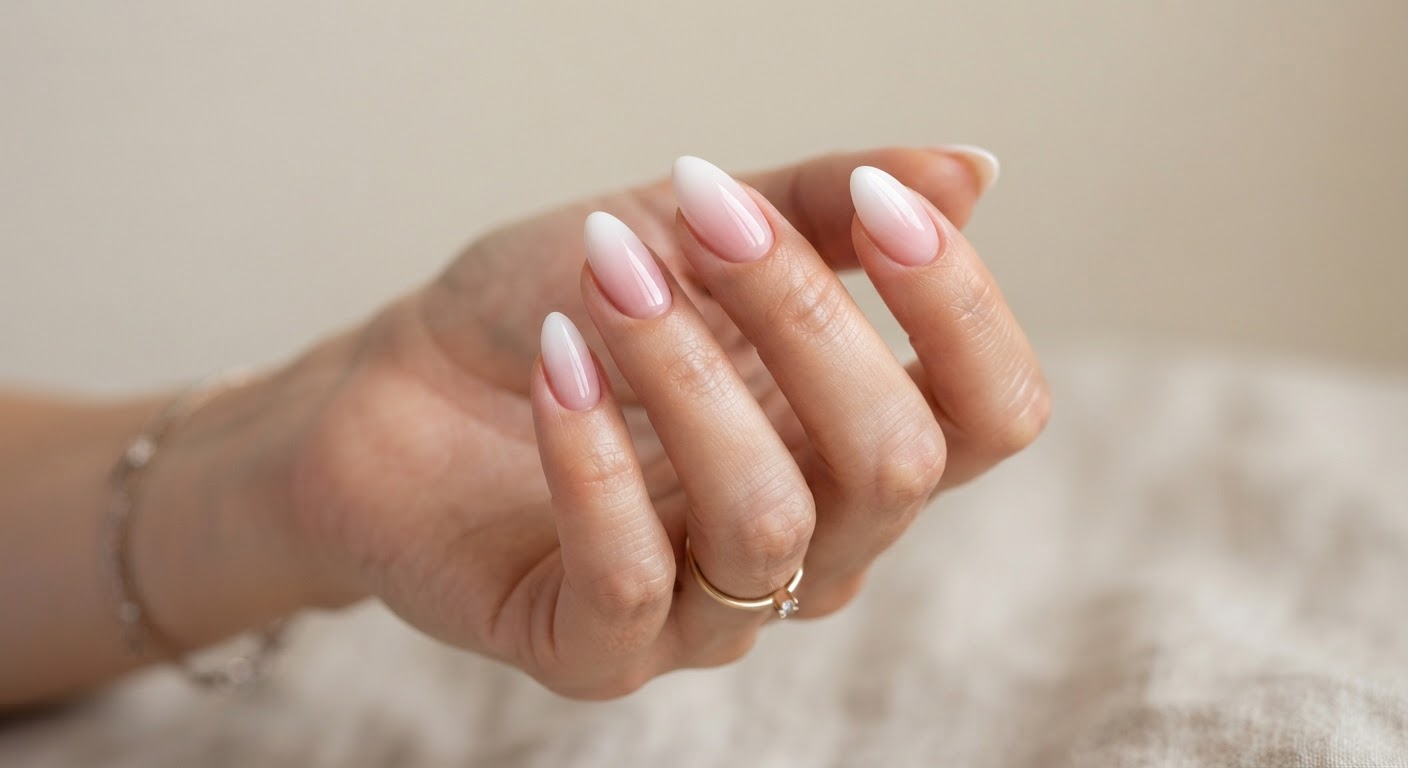
Ombre nails are the rare manicure that looks expensive without being complicated: two colours blended so smoothly that the eye reads one continuous fade instead of a hard line. The look has been in and out of fashion for decades, and it keeps coming back because a vertical gradient flatters almost every nail length, shape and skin tone.
This guide explains what "ombre" actually means, the main ways the gradient is created, how to do ombre nails at home step by step, how long a set lasts, and how to remove it without damage. Then it works through 30 ombre nail ideas — from the classic baby boomer French fade to chrome, velvet cat-eye and aura gradients — each with the colours you need to ask for.
What "ombre" means in nails
"Ombré" is French for shaded. In nail terms it describes a colour that fades from light to dark (or the other way around) across the nail, rather than sitting flat in a single tone. The softer, subtler version of the same idea is often called a sombré.
The gradient can run in any direction:
- Vertical — from cuticle to tip. This is the most common ombre and the one that visually lengthens the nail bed.
- Horizontal — side to side across the nail.
- Diagonal — a slanted fade, popular for a modern, less symmetrical look.
- Centre-out — a glow that blooms from the middle of the nail and fades outward, which is the base of the aura nail trend.
Any nail coating can be ombred: regular polish, gel, acrylic, dip powder, press-ons and wraps. The technique changes, not the concept. The pink-to-white French fade known as baby boomer is an ombre, and so is the pearlescent wash of a glazed finish — they simply use different products to create the fade.
Because the transition is soft, ombre is also one of the most forgiving designs at the cuticle. There is no hard edge to look grown-out, so the regrowth line is far less obvious than it is on a solid colour.
How ombre nails are made
There is no single "ombre product." The gradient comes from one of a handful of techniques, and which one suits you depends on the coating and how precise you want the fade.
| Method | Best for | Skill level | Notes |
|---|---|---|---|
| Makeup sponge | Regular polish and gel | Beginner | Fast, forgiving, slight texture that needs a top coat |
| Ombre brush or blooming gel | Gel | Intermediate | Cleaner, more precise fade; the salon standard |
| Eyeshadow or pigment | Aura and soft powder blends | Beginner | Airy, watercolour effect; needs a matte base and a top coat |
| Airbrush | Salon | Professional | The smoothest, most seamless gradient available |
| Dip powder or acrylic layering | Dip and acrylic sets | Intermediate | Overlapping layers blended before sealing; very durable |
| Press-ons and wraps | Instant wear | None | Pre-printed gradients, no blending required |
For a first attempt at home, the sponge method is the one to learn. It works with the polish you already own, and mistakes are easy to build over.
How to do ombre nails at home
These steps cover the sponge method with gel polish. For regular polish, swap the lamp cures for air-drying between coats. The colour sequence matters: light at the cuticle fading to dark at the tip is the version that lengthens the nail, while reversing it — dark at the cuticle, light at the tip — gives a bolder, top-heavy look.
Step 1: Prep and shape
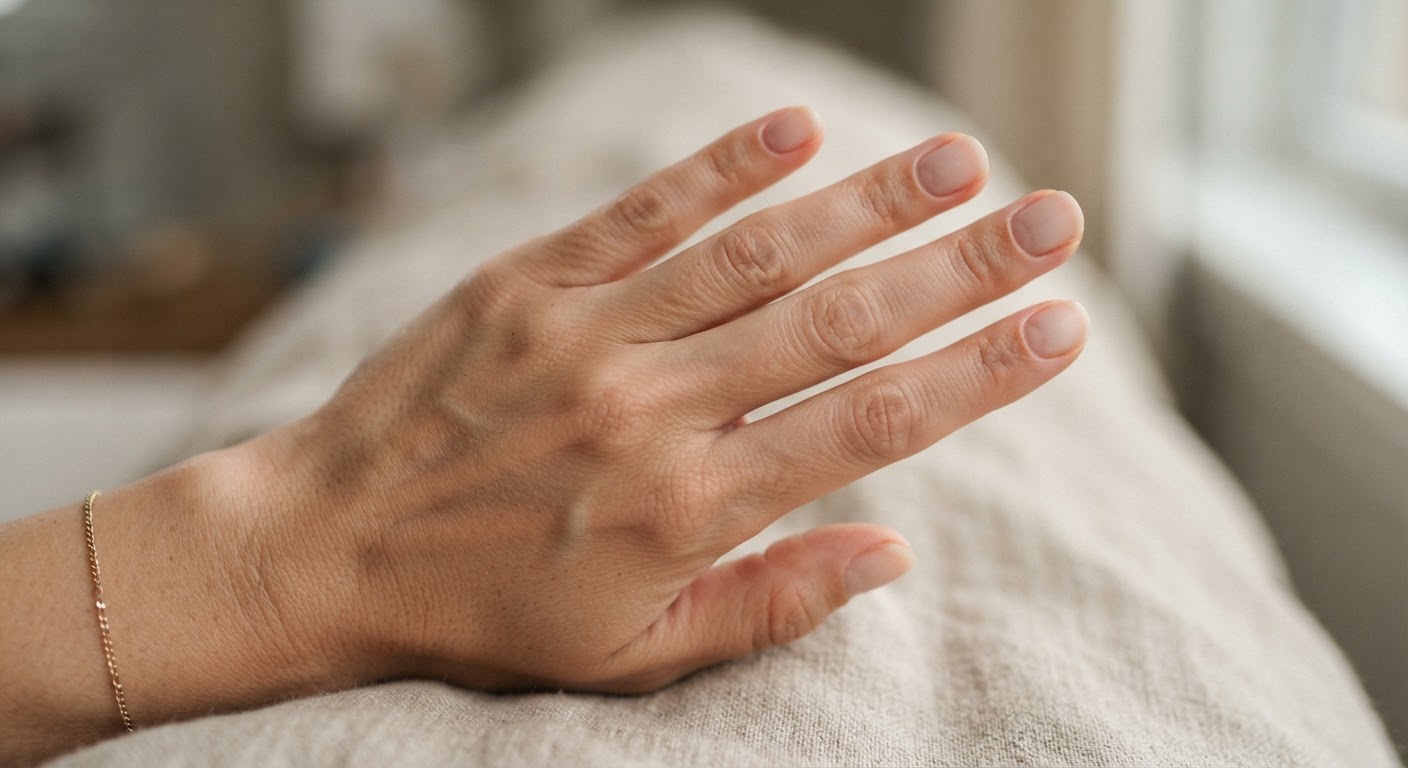
Start with clean, dry, polish-free nails. Push back the cuticles gently — don't cut living skin — and file the free edge into your preferred shape. Lightly buff the surface to remove shine, then wipe each nail with isopropyl alcohol or a nail dehydrator so the base has something to grip. Clean prep is what stops a gel ombre from lifting at the cuticle within a week.
Step 2: Apply a base coat
Apply a thin base coat and cure it if you are using gel. A base coat protects the nail from staining and gives the colour something to bond to. If you want a more opaque gradient, paint one coat of your lightest shade over the whole nail now and cure it — this becomes the "background" the sponge blends into.
Step 3: Load the sponge
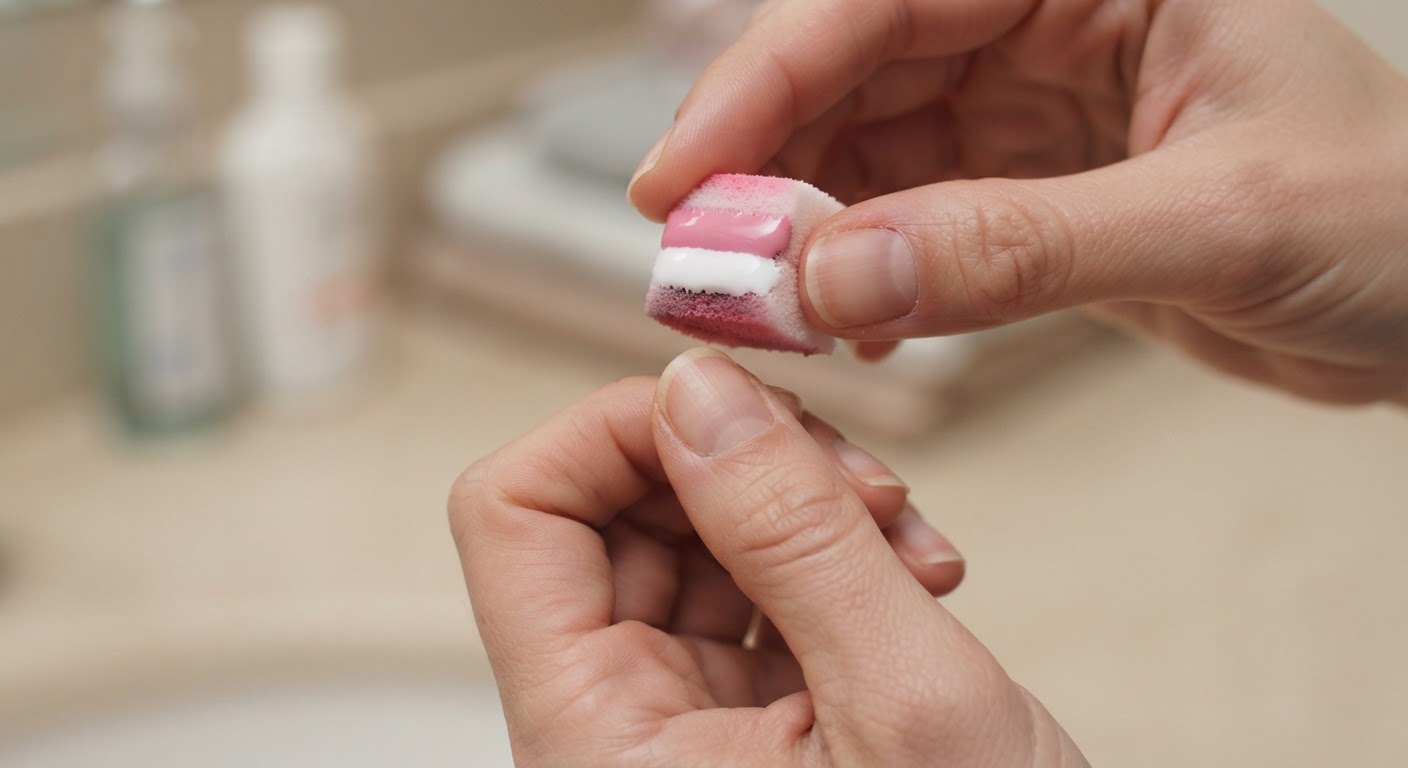
Tear off a small piece of a latex-free makeup sponge — or use a purpose-made nail art sponge. Paint two bands of polish side by side so they overlap slightly where they meet. Keep the bands the same width as your nail. For a two-colour fade you need the lightest shade and the one you are fading into; for a three-colour ombre, paint three touching bands, lightest to darkest.
A damp sponge absorbs less polish and keeps the colour wet longer, but it isn't essential. What matters is that the polish on the sponge is still glossy when it touches the nail.
Step 4: Dab, don't drag
Press the sponge onto the nail in light, bouncing motions, lifting between each press. Dragging smears the bands together and muddies the gradient. Work in two or three thin passes rather than one heavy one, reloading the sponge between passes so the colours stay wet. Practise on a bare nail or a swatch stick first — the pressure you need is lighter than most people expect.
Step 5: Blend the seam
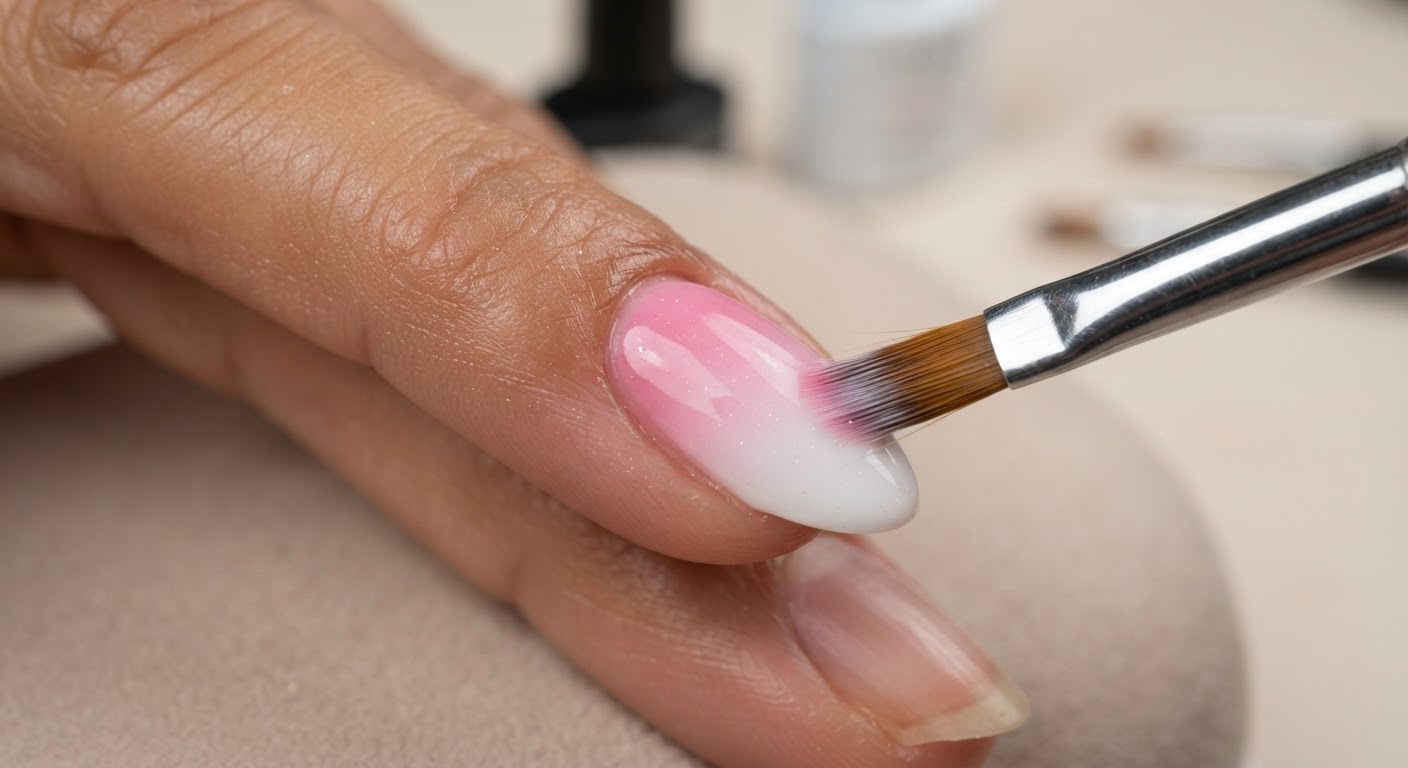
If a visible line remains where the colours meet, tidy it with a small ombre or liner brush. Use short, light strokes perpendicular to the bands to feather the transition, then wipe the brush and repeat. With gel, do this before curing so the polish stays workable; with regular polish, work quickly before it starts to set. Some techs skip the sponge entirely and blend the colours with a brush and a drop of clear gel on the nail, which gives a cleaner fade but takes more practice. Blooming gel is a related product that lets colour spread on its own for a soft, watercolour effect.
Step 6: Cure
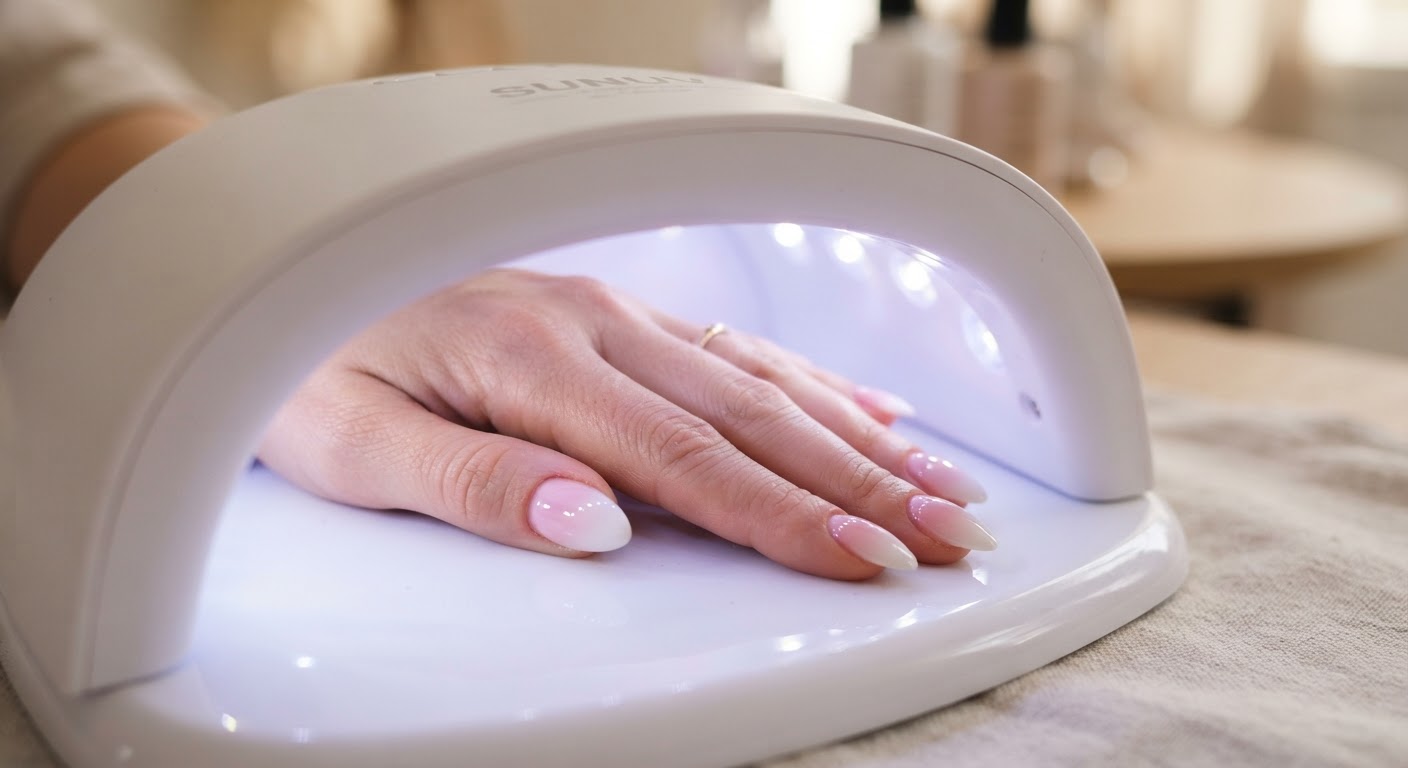
For gel, cure each layer under a UV LED nail lamp for the full time your gel manufacturer recommends — never shorten it for speed. Under-cured gel is both a lifting risk and the main cause of acrylate sensitivity. Repeat the sponge and cure steps until the gradient is as saturated as you want it; two to three rounds is typical.
Step 7: Clean up and seal
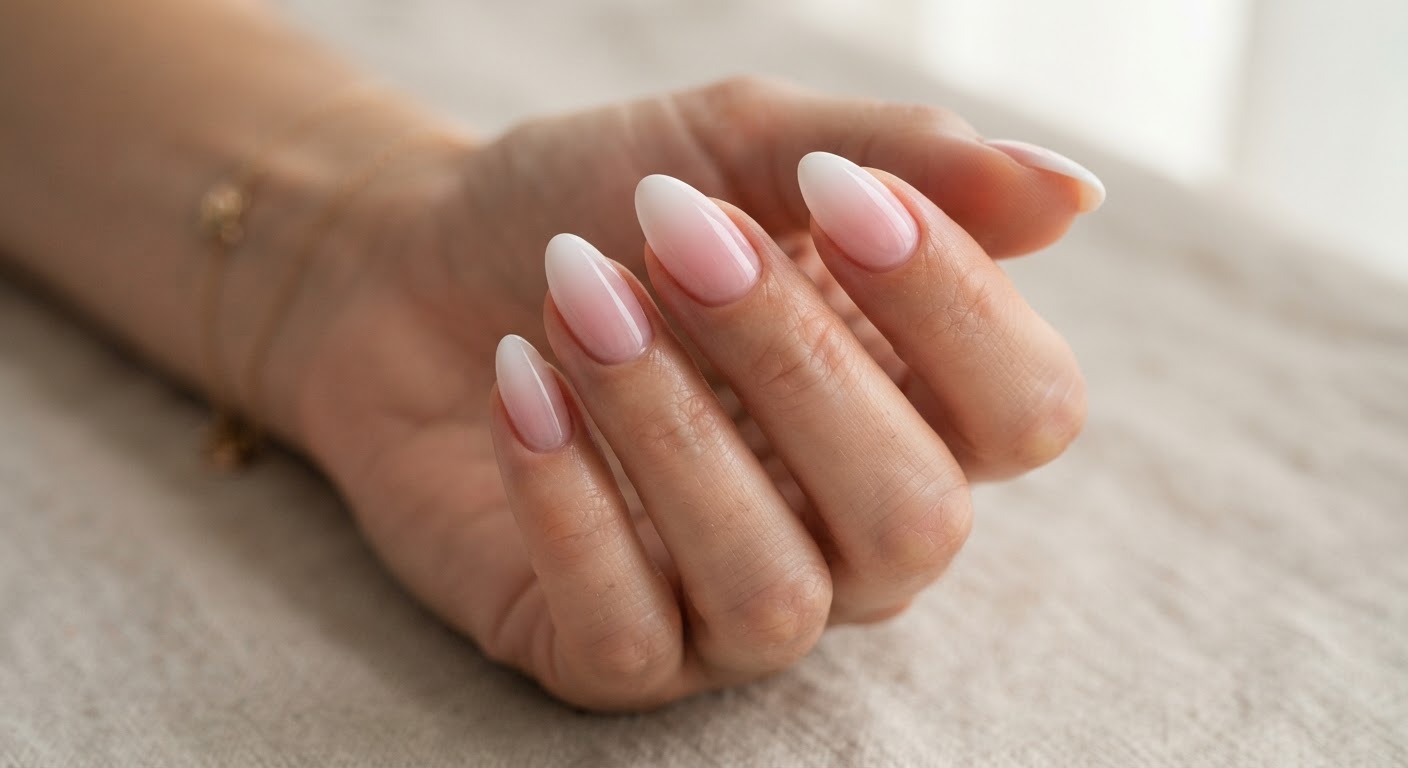
Clean any polish from the surrounding skin with a small brush dipped in acetone, then seal the whole nail with a glossy top coat. Because sponging leaves a slightly stippled surface, one thin coat followed by a second coat gives the smoothest, glassiest finish. For a matte gradient, switch the final layer to a matte top coat. Finish with cuticle oil around each nail.
Watch: three ways to create an ombre
Professional nail education brand Young Nails demonstrates three different ways to build a gradient — useful for seeing how lightly the colour should be worked:
How long ombre nails last
Wear time depends on the coating, not on the ombre itself:
- Gel ombre: two to three weeks without chipping.
- Regular polish ombre: five to seven days before the edges start to wear.
- Dip powder or acrylic ombre: two to four weeks, and often longer with a fill.
- Press-on ombre: one to two weeks with glue and clean prep, or a single day or two with adhesive tabs.
To get the most from a set, oil your cuticles daily, wear gloves for dishes and cleaning, and refresh the top coat if the surface starts to dull. Ombre hides regrowth well, which is why so many people stretch a set a few days longer than they would a solid colour.
How to remove ombre nails safely
Gel ombre is a soak-off manicure, so treat it like one:
- Buff the top layer of gel lightly to break the seal — don't file down to the natural nail.
- Soak in 100% acetone for 10 to 15 minutes, using soaked cotton pads sealed with foil or a warm acetone bowl.
- Gently slide the softened gel off with a wooden pusher. If it resists, soak another five minutes rather than forcing it.
- Buff away any residue, then oil the cuticles heavily.
Never pick or peel a gel ombre off. Prying takes layers of the natural nail plate with it, and those layers take months to grow back. Regular polish ombre comes off with ordinary nail polish remover. Dip and acrylic ombre needs filing before an acetone soak, and is best handled in the salon if you are not confident with an e-file.
Advantages and drawbacks of ombre nails
Advantages
- The soft fade flatters every nail length and makes short nails look longer.
- It hides regrowth at the cuticle far better than a solid colour.
- It works across every coating, from regular polish to dip and press-ons.
- A two-colour fade reads as an expensive, dimensional finish with very little product.
- It pairs with any top finish: glossy, matte, chrome, glitter or cat-eye.
Drawbacks
- A clean fade takes practice; early attempts can look stripey or muddy.
- The sponge method leaves a slight texture that needs a good top coat to smooth.
- High-contrast colour combinations show every flaw in the blend.
- Airbrushed results are hard to match at home.
- Like all gel services, incorrect curing or gel on the skin carries a sensitisation risk.
When ombre is not the right choice: if you want a razor-sharp graphic line, a crisp French tip or a geometric design will do it better. If you change colour every week, a soak-off gel ombre may be more maintenance than you want — a regular polish ombre or a press-on set is the lower-commitment route.
Ombre vs French, baby boomer, aura and cat-eye
A few nail terms sit close to ombre and get mixed up:
- Ombre vs French: a French manicure has a defined tip line. A French ombre blends that line away into a gradient — the same palette, a completely different finish.
- Baby boomer: the specific pink-to-white French fade, and the most requested ombre of all.
- Aura: a centre-out gradient that glows from the middle of the nail. It is an ombre built with pigment or eyeshadow rather than a sponge.
- Cat-eye: a magnetic gel that creates a movable light beam. A cat-eye ombre combines that beam with a dark-to-light fade — see our cat eye nails guide.
- Chrome: a mirror finish, not a gradient — but a chrome nails overlay on top of an ombre is one of the most popular combinations right now.
30 ombre nail ideas
The ideas below are grouped by mood. Every one lists the shades that define the look, so you can screenshot the image and hand it straight to your tech.
French fades and baby boomer
1. Classic Baby Boomer
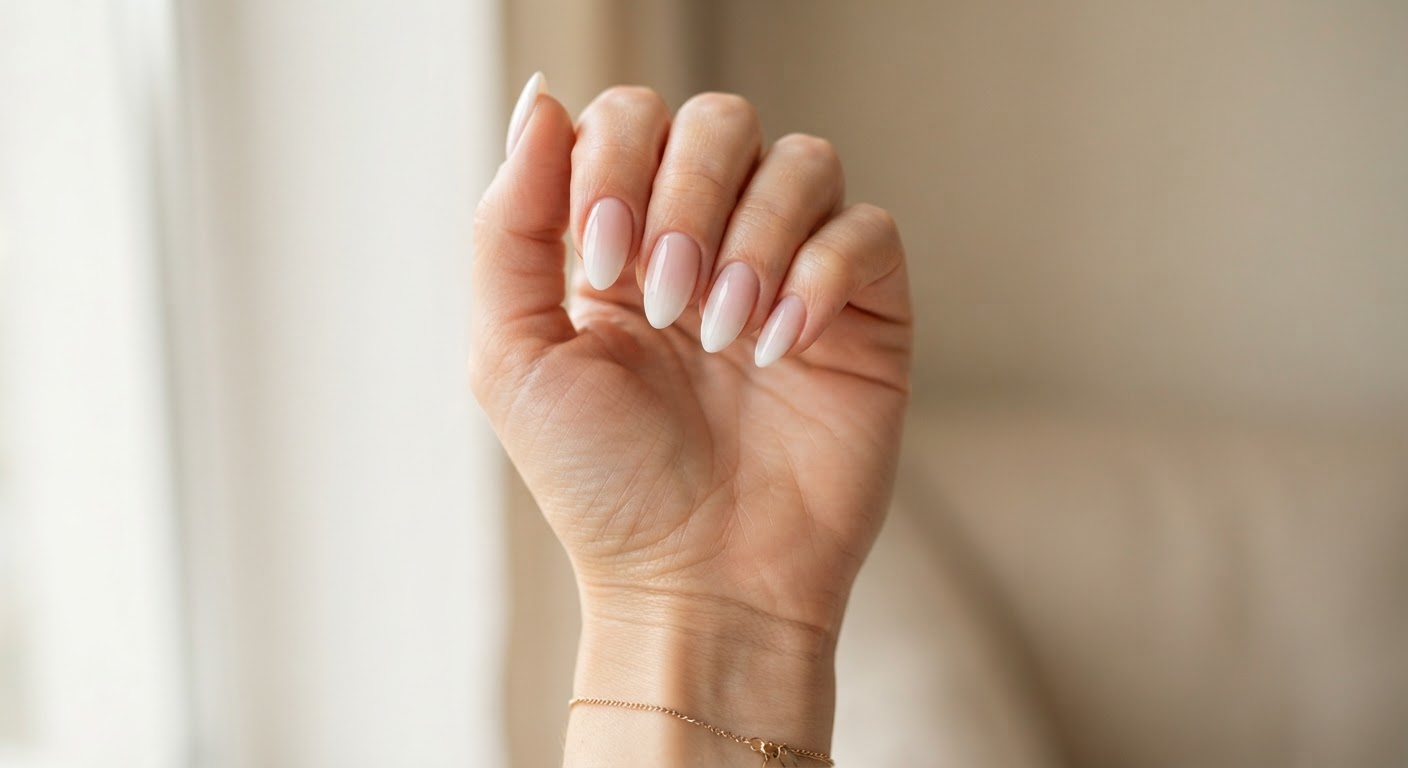
The original and still the most requested ombre: a sheer pink at the cuticle melting into opaque white at the tip, with no visible smile line. It reads like a natural nail that happens to be perfect, and it grows out beautifully.
What to ask your nail tech for: "A classic baby boomer — sheer pink at the base fading into soft white at the tips, glossy, almond shape."
| Polish | Shop |
|---|---|
| Sheer pink gel | Shop sheer pink gel |
| Opaque white gel | Shop white gel |
| Glossy top coat | Shop gel top coat |
2. Milky French Ombre
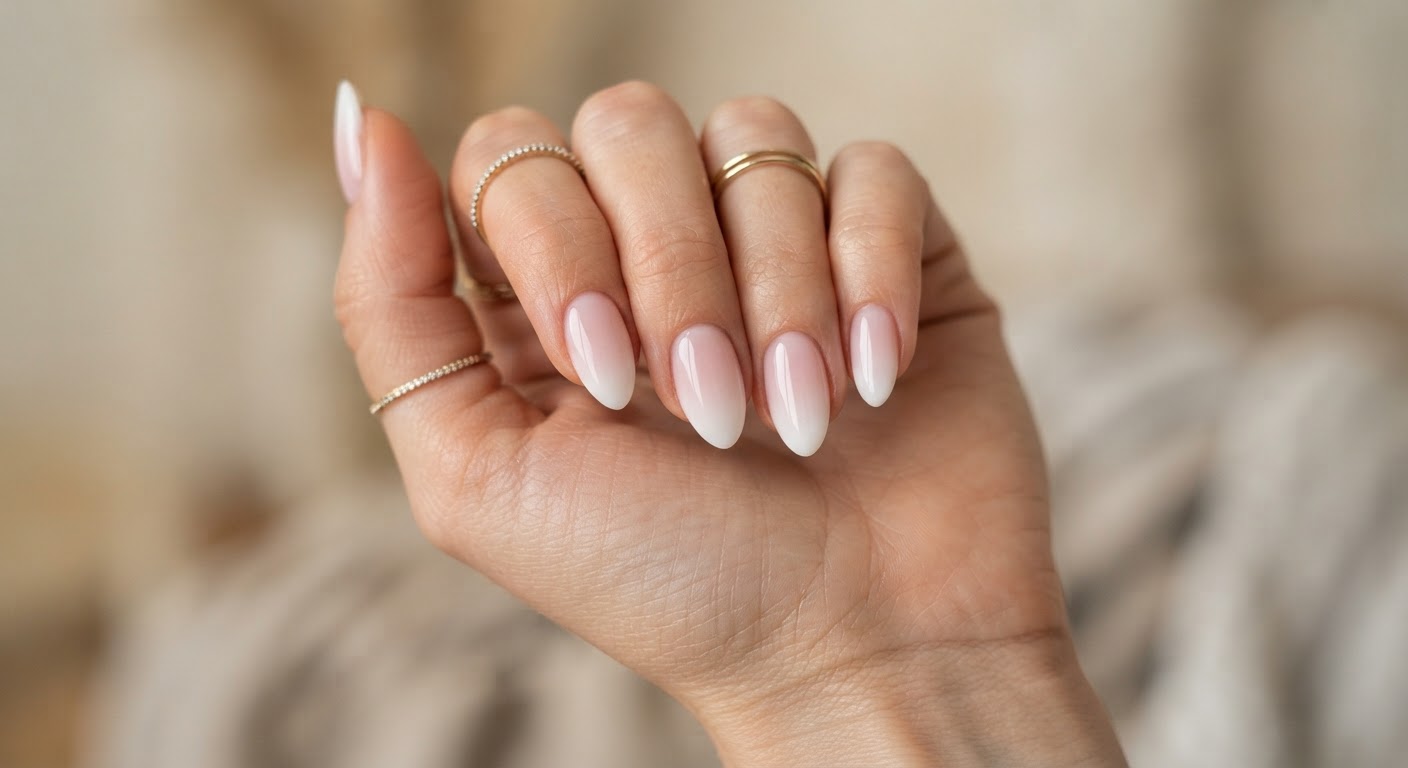
A milkier, cooler version of the baby boomer. The base is semi-sheer rather than pink, so the fade looks hazy and modern — closer to a filtered photo than a traditional French manicure.
What to ask your nail tech for: "A milky French ombre — semi-sheer milky base with a soft diffused white tip, no hard line."
| Polish | Shop |
|---|---|
| Milky white gel | Shop milky white gel |
| Milky pink gel | Shop milky pink gel |
| Glossy top coat | Shop gel top coat |
3. Glazed Chrome French Ombre
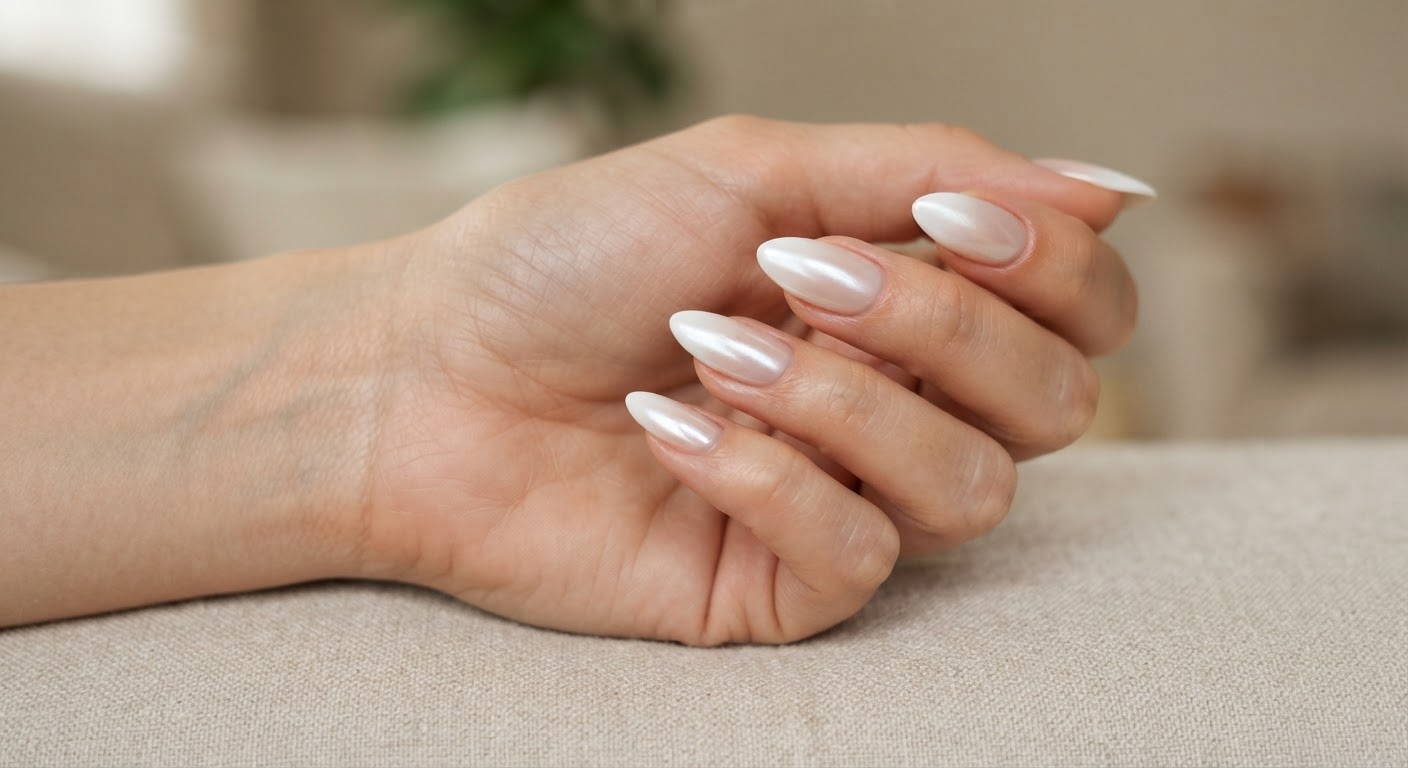
The baby boomer gets a pearlescent glaze. A fine white-to-nude ombre is finished with a sheer chrome powder or pearl glaze, giving the fade a soft reflective sheen. It is the ombre equivalent of the glazed donut finish.
What to ask your nail tech for: "A French ombre with a pearlescent chrome glaze over the top — soft, not mirror-metallic."
| Polish | Shop |
|---|---|
| Pearl chrome powder | Shop pearl chrome powder |
| Milky white gel | Shop milky white gel |
| Glossy top coat | Shop gel top coat |
4. Micro French Ombre
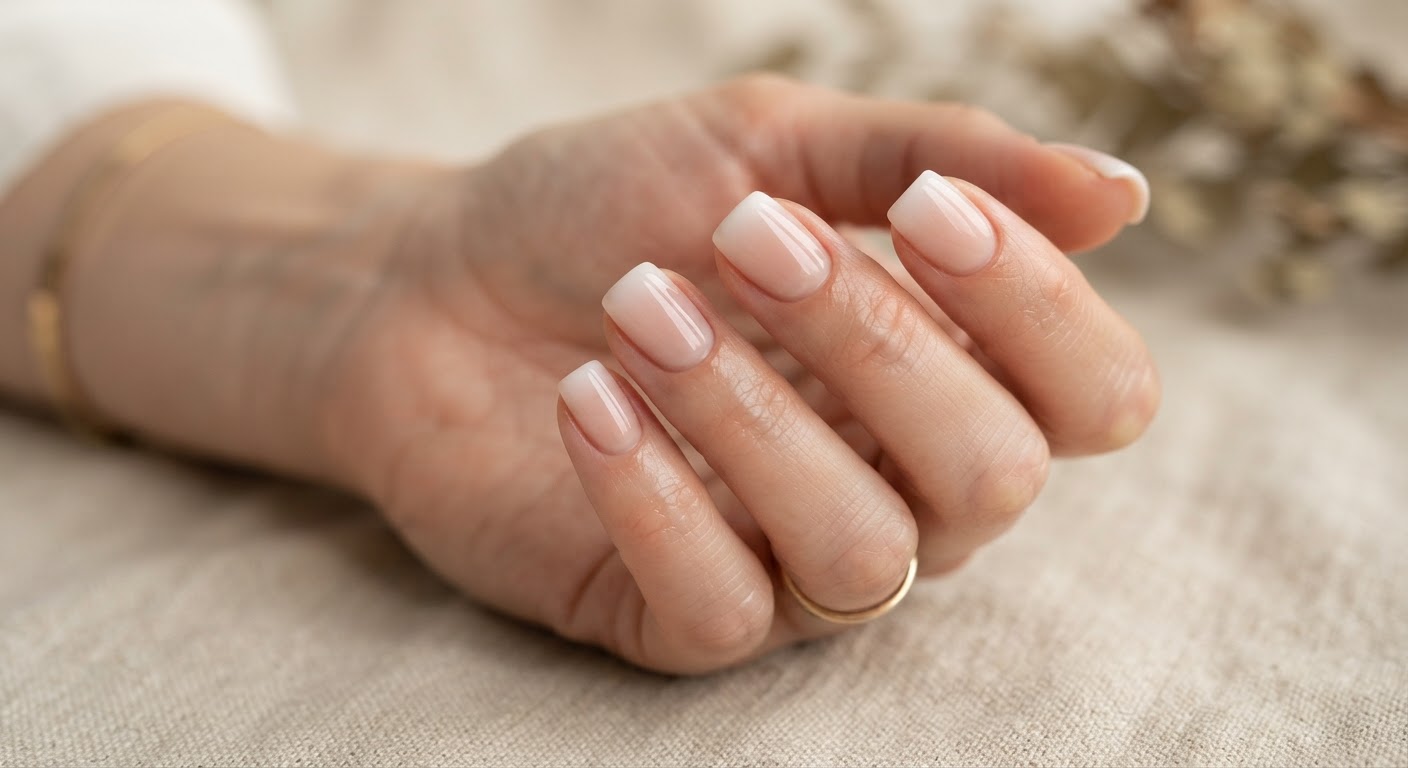
A whisper-thin gradient tip on a sheer nude base, essentially a micro French manicure with the line softened. It is the most understated idea here and works especially well on short, square nails.
What to ask your nail tech for: "A micro French ombre — a very thin soft white fade right at the tip over a sheer nude base."
| Polish | Shop |
|---|---|
| Sheer nude gel | Shop sheer nude gel |
| White gel | Shop white gel |
| Fine liner brush | Shop liner brush |
5. Lavender French Ombre
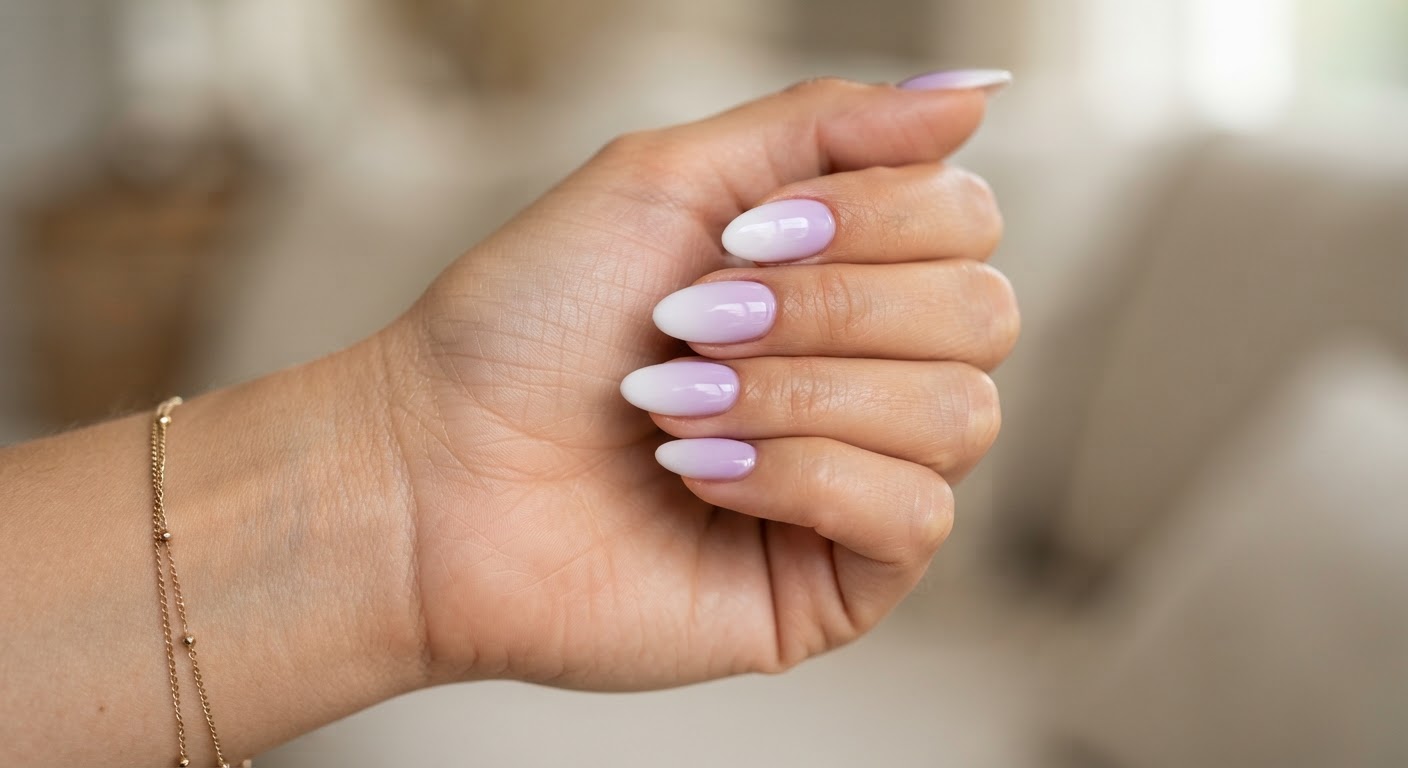
Swap white for pastel purple and the French fade becomes something more playful. Lavender at the tip fading into a clear or nude base stays soft enough for everyday wear while still reading as a colour choice.
What to ask your nail tech for: "A French ombre with lavender fading into the base instead of white, glossy."
| Polish | Shop |
|---|---|
| Lavender gel | Shop lavender gel |
| Sheer nude gel | Shop sheer nude gel |
| Glossy top coat | Shop gel top coat |
Nude and neutral ombre
6. Beige to Cream Ombre
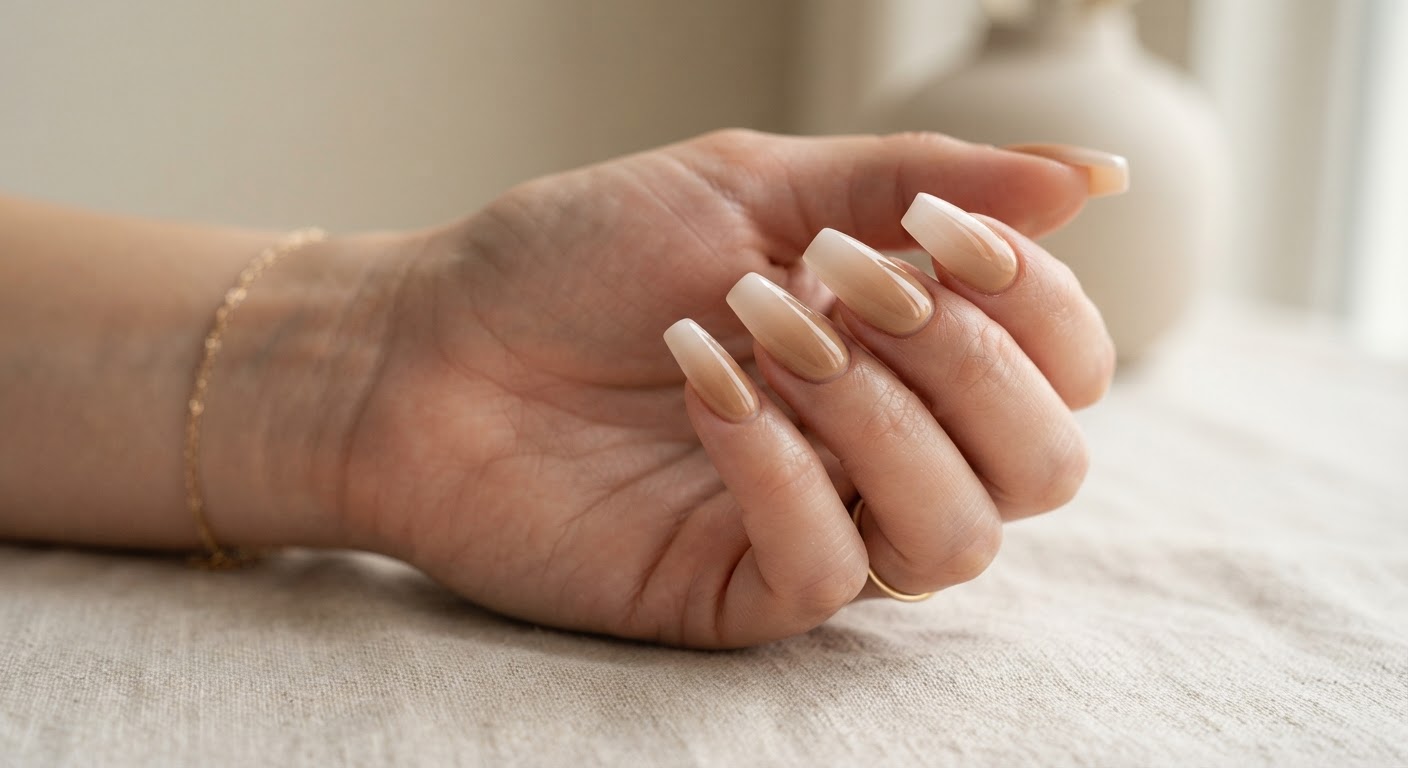
Two neutrals, one seamless fade. Beige at the cuticle and cream at the tip is the quietest way to wear ombre, and it looks especially good on longer coffin shapes where the gradient has room to travel.
What to ask your nail tech for: "A beige-to-cream vertical ombre, glossy, no glitter."
| Polish | Shop |
|---|---|
| Beige gel | Shop beige gel |
| Cream gel | Shop cream gel |
| Glossy top coat | Shop gel top coat |
7. Glazed Caramel Ombre
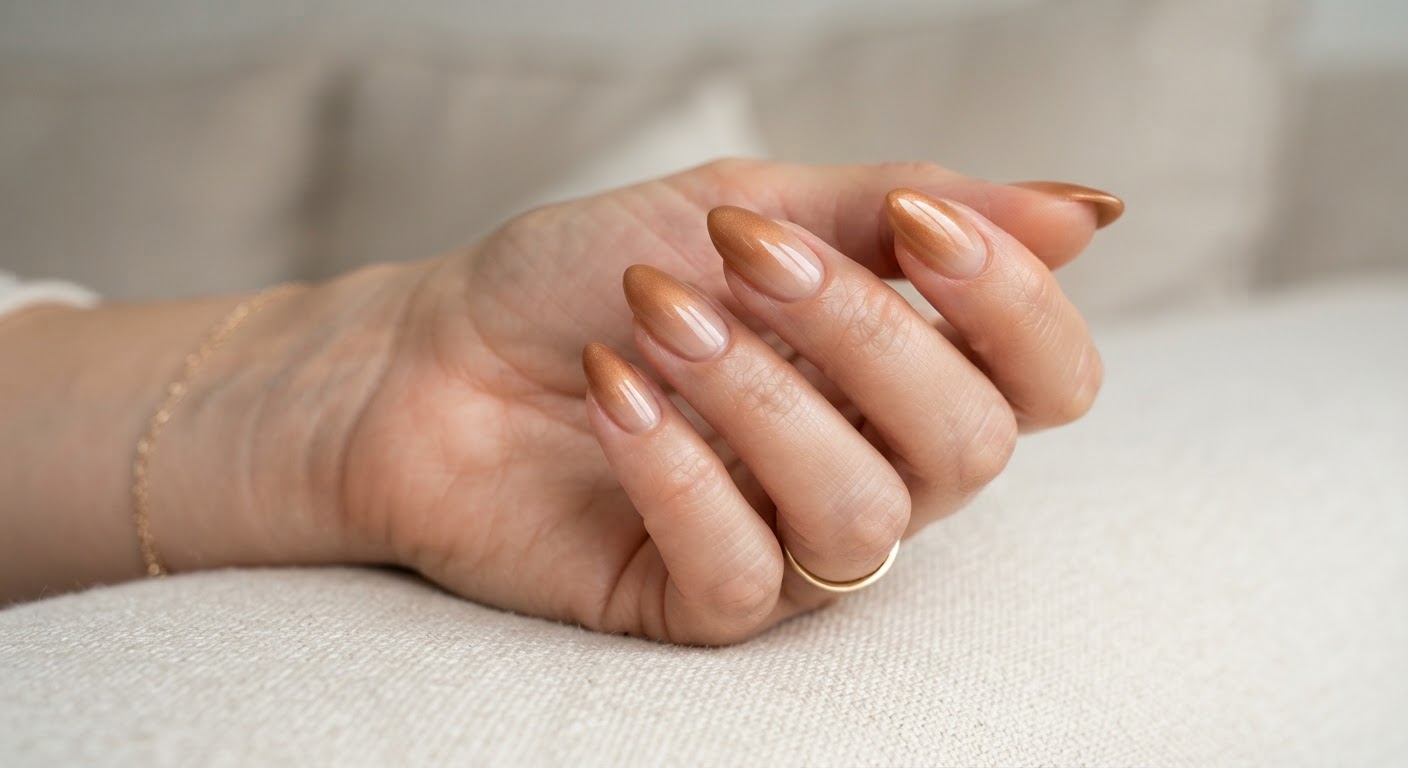
Warm caramel fading into bare nude, finished with a bronze shimmer glaze. The metallic wash makes the gradient look lit from within and suits medium and deep skin tones particularly well.
What to ask your nail tech for: "A caramel-to-nude ombre with a warm bronze glaze over the top."
| Polish | Shop |
|---|---|
| Caramel gel | Shop caramel gel |
| Bronze chrome powder | Shop bronze chrome |
| Glossy top coat | Shop gel top coat |
8. Mocha Nude Ombre
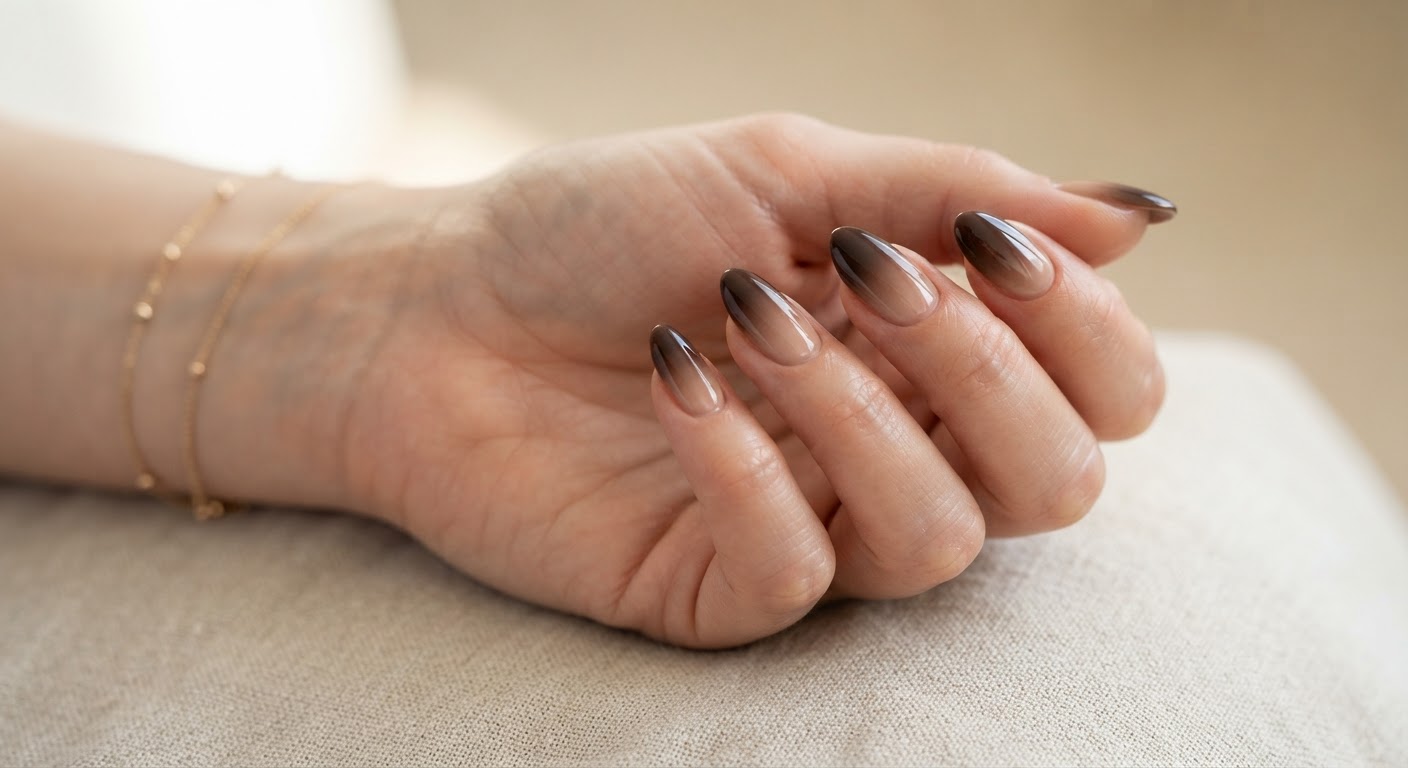
A rich espresso brown that fades into a soft beige base. This is the high-contrast neutral ombre — bold enough to read as a design, neutral enough to wear to work.
What to ask your nail tech for: "An espresso-to-beige ombre, deep at the tips, glossy."
| Polish | Shop |
|---|---|
| Espresso brown gel | Shop espresso gel |
| Beige gel | Shop beige gel |
| Glossy top coat | Shop gel top coat |
9. Blush Nude Ombre
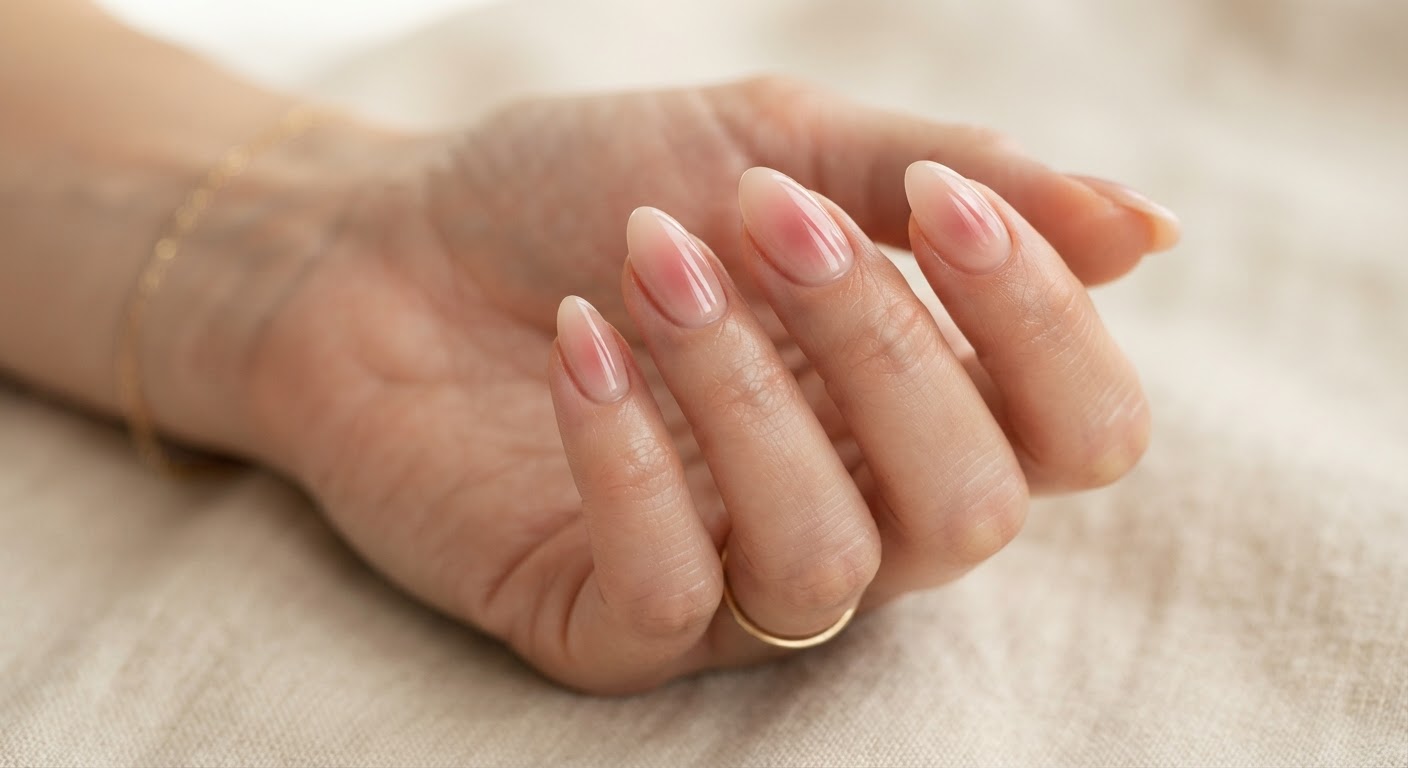
Instead of a cuticle-to-tip fade, the blush is concentrated in the centre of the nail and diffused outward, so the nail looks flushed rather than painted. It is a gentle introduction to the aura style.
What to ask your nail tech for: "A sheer nude base with a soft rose blush concentrated in the middle of each nail, fading out."
| Polish | Shop |
|---|---|
| Blush pink gel | Shop blush pink gel |
| Sheer nude gel | Shop sheer nude gel |
| Glossy top coat | Shop gel top coat |
Pink and red ombre
10. Strawberry Milk Ombre
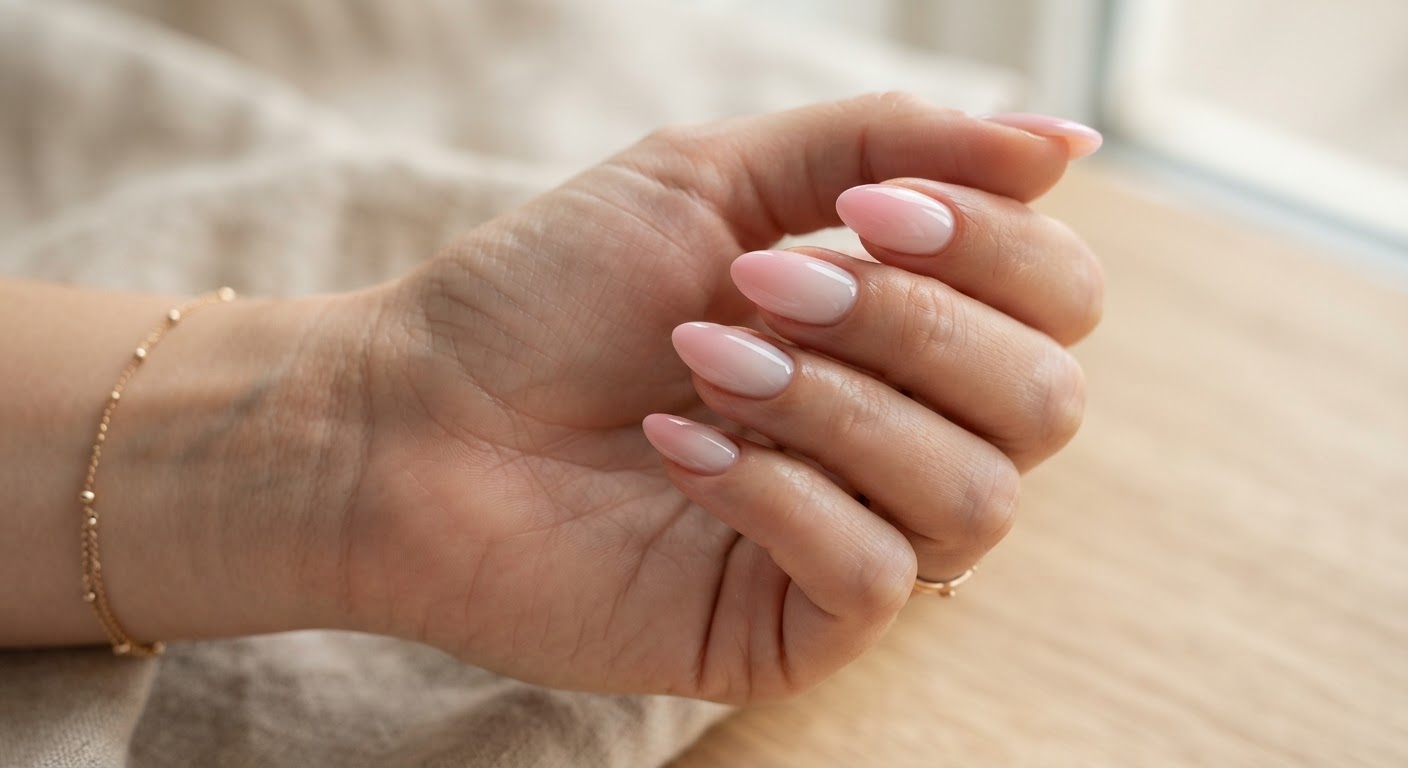
Milky pink fading into milky white, like the last swirl of strawberry in a glass of milk. It is soft, a little retro, and one of the easiest fades to wear on short nails.
What to ask your nail tech for: "A strawberry milk ombre — milky pink fading into semi-sheer white, glossy."
| Polish | Shop |
|---|---|
| Strawberry pink gel | Shop strawberry pink gel |
| Milky white gel | Shop milky white gel |
| Glossy top coat | Shop gel top coat |
11. Bubblegum Pink Ombre
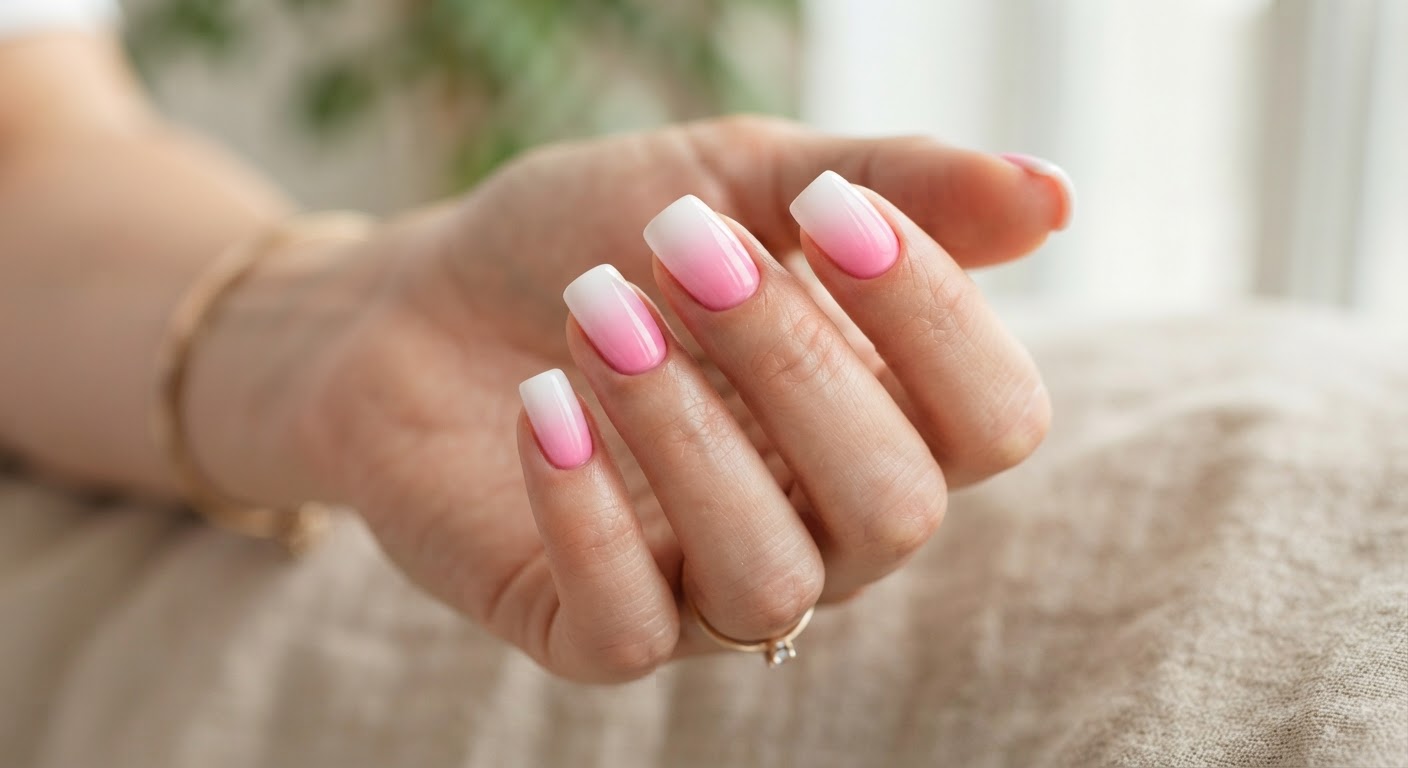
A saturated candy pink fading to white is the most cheerful ombre on the list. On a square shape it reads graphic and modern; on almond it turns softer and sweeter.
What to ask your nail tech for: "A bubblegum pink to white ombre, pink at the cuticle, crisp but blended."
| Polish | Shop |
|---|---|
| Bubblegum pink gel | Shop bubblegum pink gel |
| White gel | Shop white gel |
| Glossy top coat | Shop gel top coat |
12. Hot Pink to White Ombre
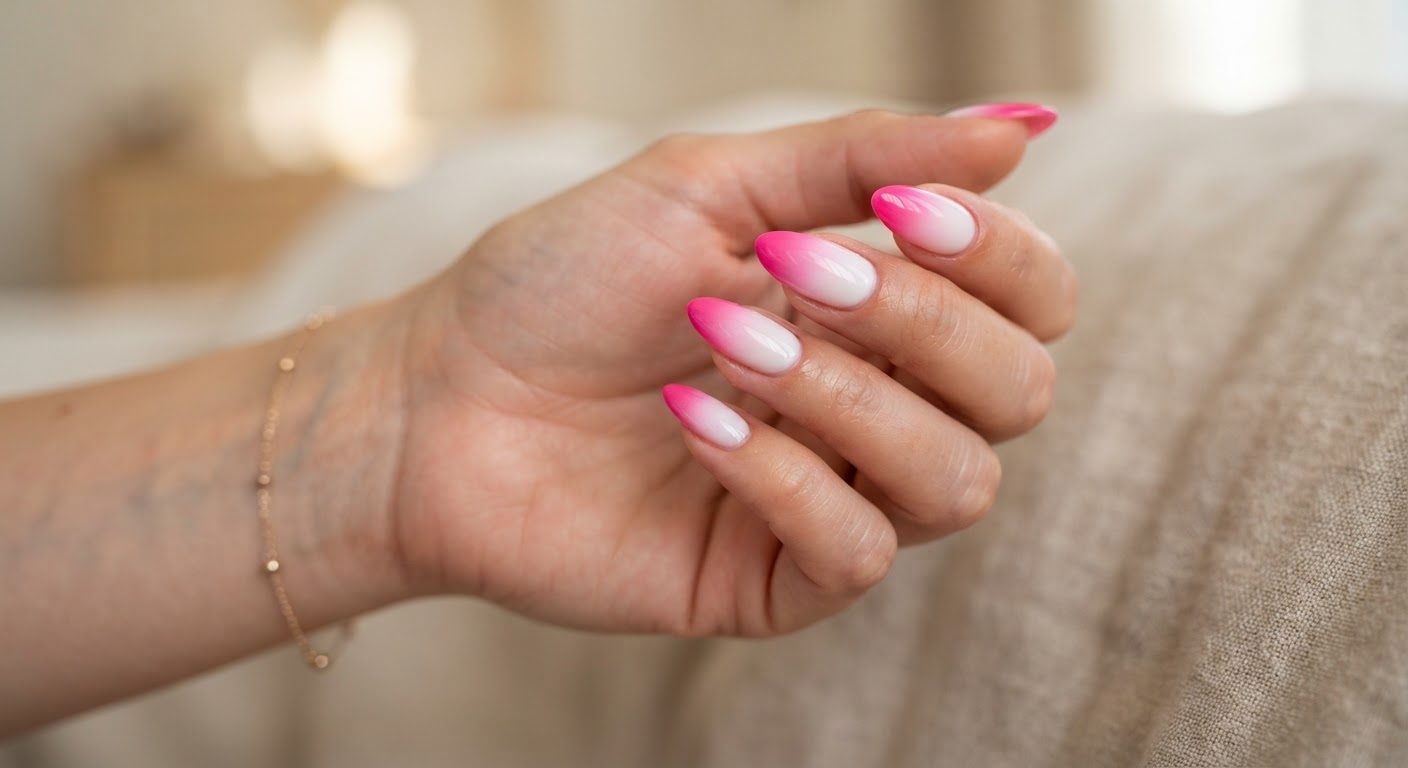
Reverse the usual direction and the same two colours feel completely different: hot pink at the tip, clean white at the base. The white cuticle side keeps a loud colour from overwhelming the hand.
What to ask your nail tech for: "A hot pink to white ombre, white at the cuticle and hot pink at the tips."
| Polish | Shop |
|---|---|
| Hot pink gel | Shop hot pink gel |
| White gel | Shop white gel |
| Glossy top coat | Shop gel top coat |
13. Rose Gold Pink Ombre
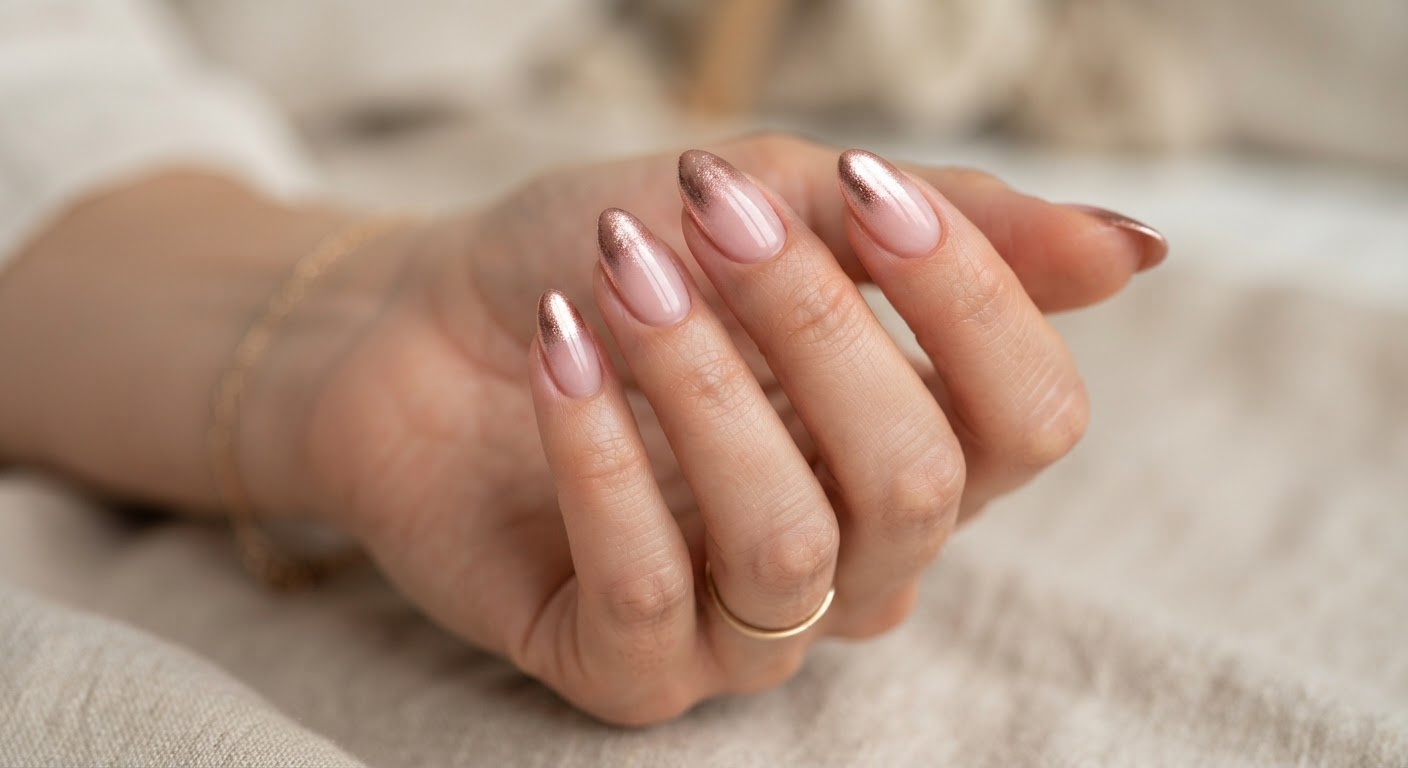
Rose gold shimmer at the tips fading into blush pink makes a metallic ombre that still feels soft. It is a favourite for weddings and any occasion where you want shine without full chrome.
What to ask your nail tech for: "A blush pink base with a rose gold metallic fade at the tips, glossy."
| Polish | Shop |
|---|---|
| Rose gold chrome powder | Shop rose gold chrome |
| Blush pink gel | Shop blush pink gel |
| Glossy top coat | Shop gel top coat |
14. Wine Red Ombre
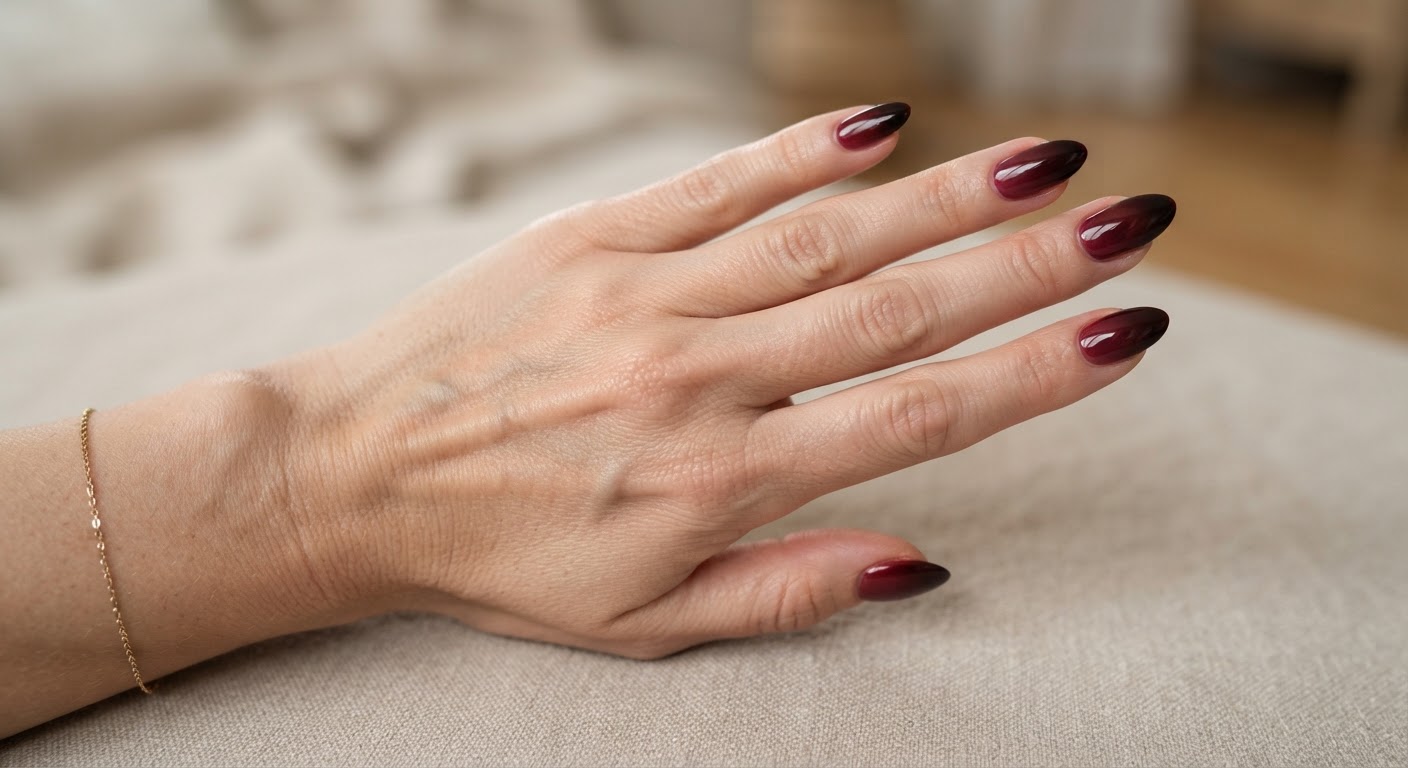
Deep oxblood fading into a lighter red is the most dramatic colour ombre here, and a natural fit for autumn and the holidays. Keep it glossy for depth, or matte it for something moodier.
What to ask your nail tech for: "A wine red to burgundy ombre, darkest at the tips, glossy."
| Polish | Shop |
|---|---|
| Burgundy gel | Shop burgundy gel |
| Red gel | Shop red gel |
| Glossy top coat | Shop gel top coat |
Colour and seasonal ombre
15. Fall Sunset Ombre
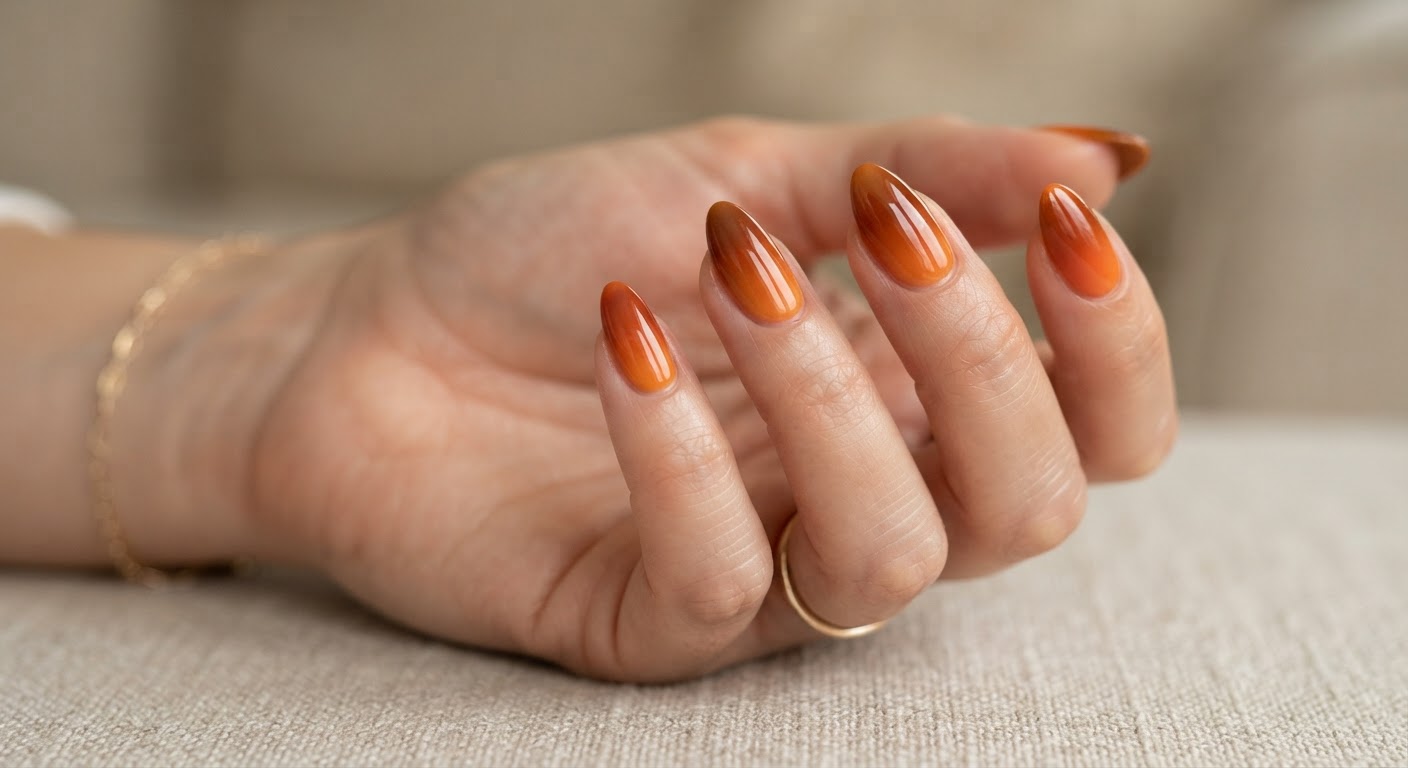
Amber, rust and burnt orange blended across each nail capture a late-autumn sky. A three-colour sponge ombre keeps the transition smooth, and it pairs with almost everything in a fall nail wardrobe.
What to ask your nail tech for: "A three-colour fall ombre — amber to rust to burnt orange, blended vertically."
| Polish | Shop |
|---|---|
| Burnt orange gel | Shop burnt orange gel |
| Amber gel | Shop amber gel |
| Glossy top coat | Shop gel top coat |
16. Winter Blue Ombre
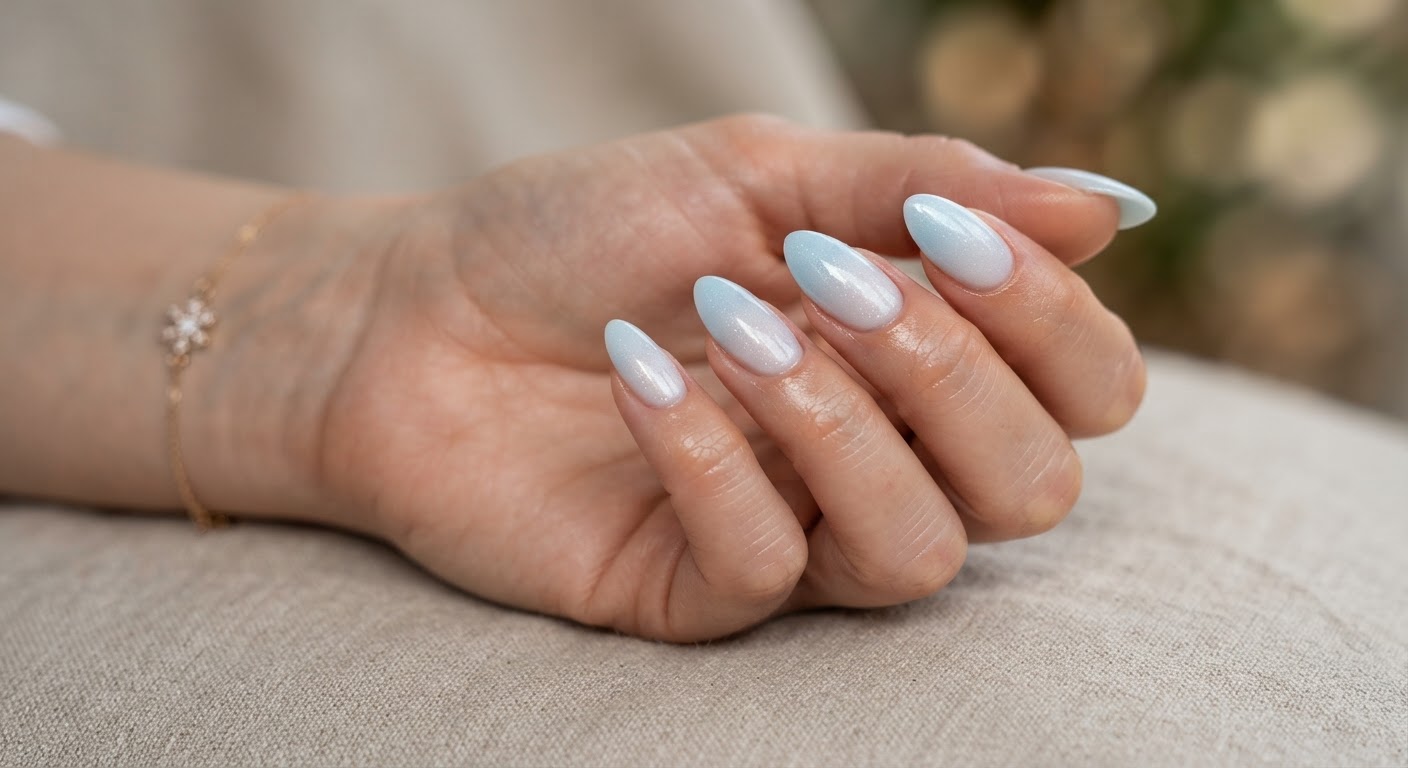
Pale icy blue fading into frosty white looks like the edge of a frozen window. A subtle shimmer in the top coat gives it a snow-glitter effect without full glitter polish.
What to ask your nail tech for: "An icy blue to white ombre with a fine shimmer finish."
| Polish | Shop |
|---|---|
| Icy blue gel | Shop icy blue gel |
| White gel | Shop white gel |
| Shimmer top coat | Shop shimmer top coat |
17. Purple to Blue Ombre
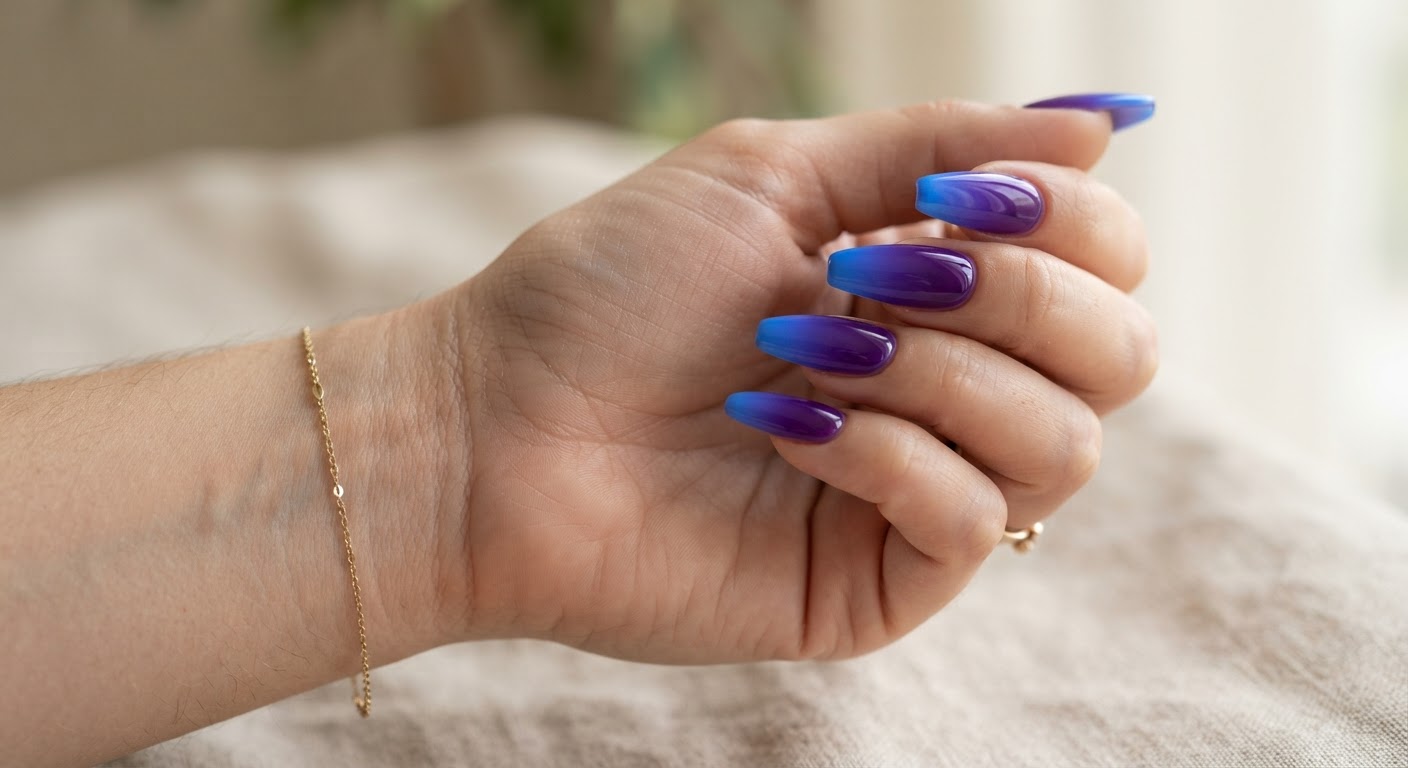
A jewel-toned fade from deep purple into electric blue. This is a two-colour blend that actually benefits from a high-contrast pairing — the seam is the point.
What to ask your nail tech for: "A purple to electric blue ombre, deep at the base and bright at the tips."
| Polish | Shop |
|---|---|
| Purple gel | Shop purple gel |
| Electric blue gel | Shop electric blue gel |
| Glossy top coat | Shop gel top coat |
18. Sage Green Ombre
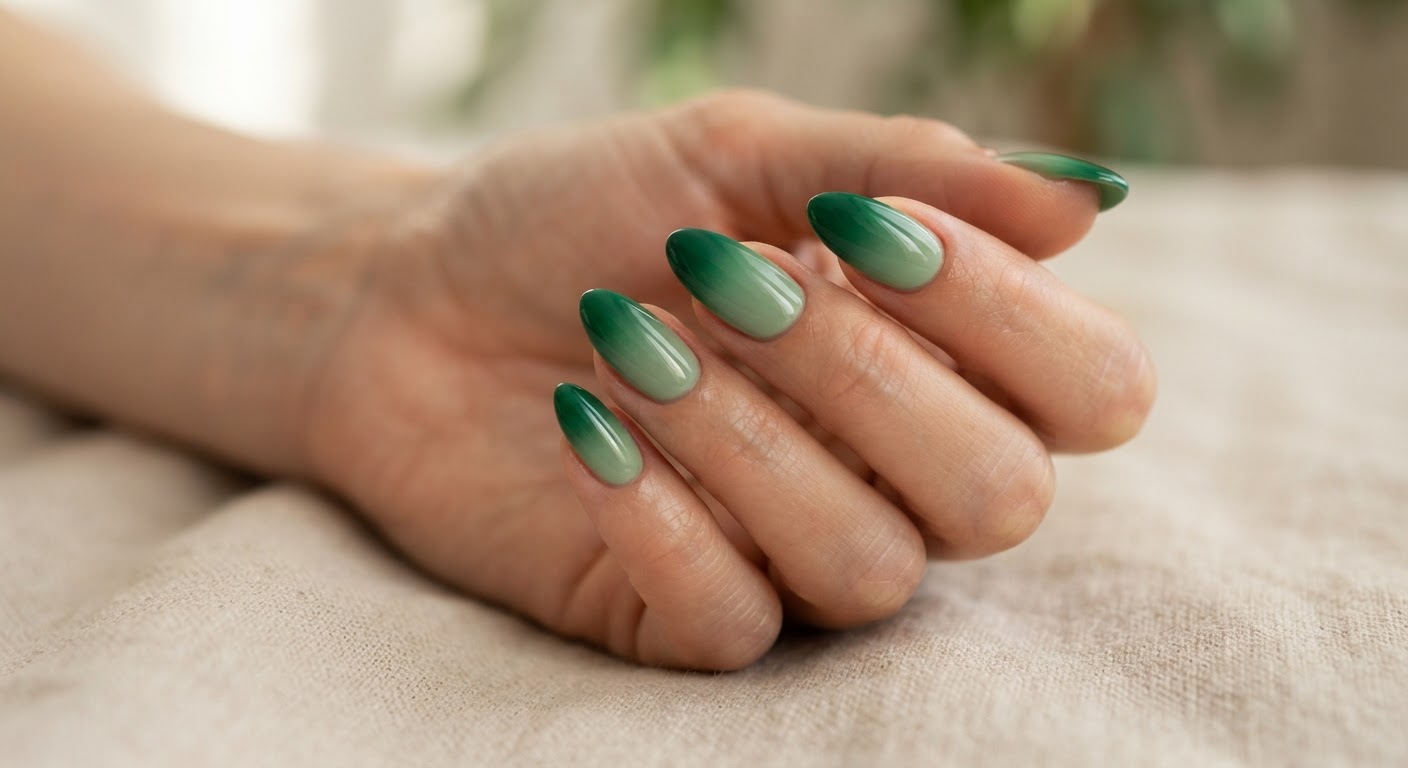
Sage green at the cuticle fading into deep emerald is muted and earthy rather than bright. It is a good choice if you want a colour ombre that still feels understated.
What to ask your nail tech for: "A sage green to emerald ombre, glossy."
| Polish | Shop |
|---|---|
| Sage green gel | Shop sage green gel |
| Emerald gel | Shop emerald gel |
| Glossy top coat | Shop gel top coat |
19. Peach to Coral Ombre
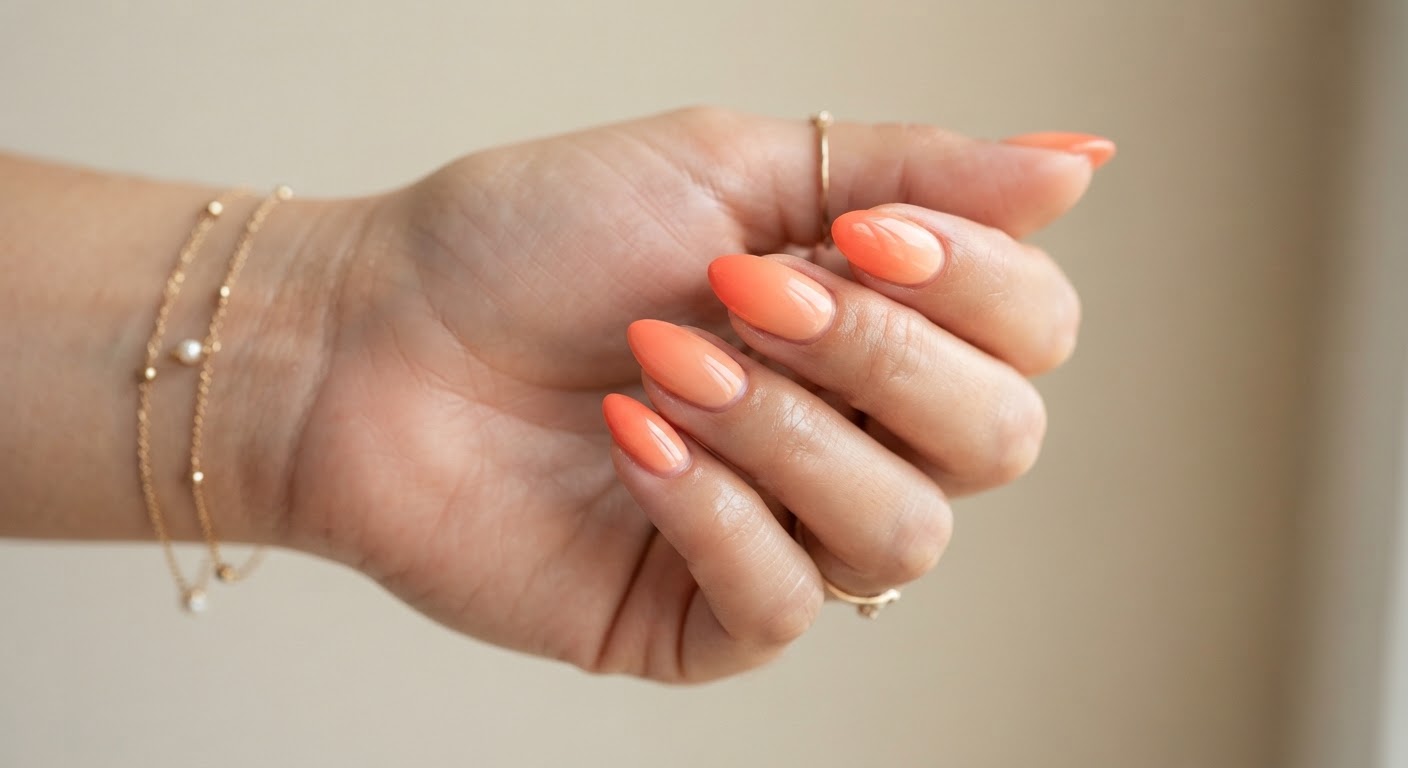
Peach fading into coral is warm, bright and genuinely flattering on most skin tones. It is a summer staple and works just as well on fingers as it does on toes.
What to ask your nail tech for: "A peach to coral vertical ombre, glossy."
| Polish | Shop |
|---|---|
| Peach gel | Shop peach gel |
| Coral gel | Shop coral gel |
| Glossy top coat | Shop gel top coat |
Finish-focused ombre
20. Gold Glitter Ombre
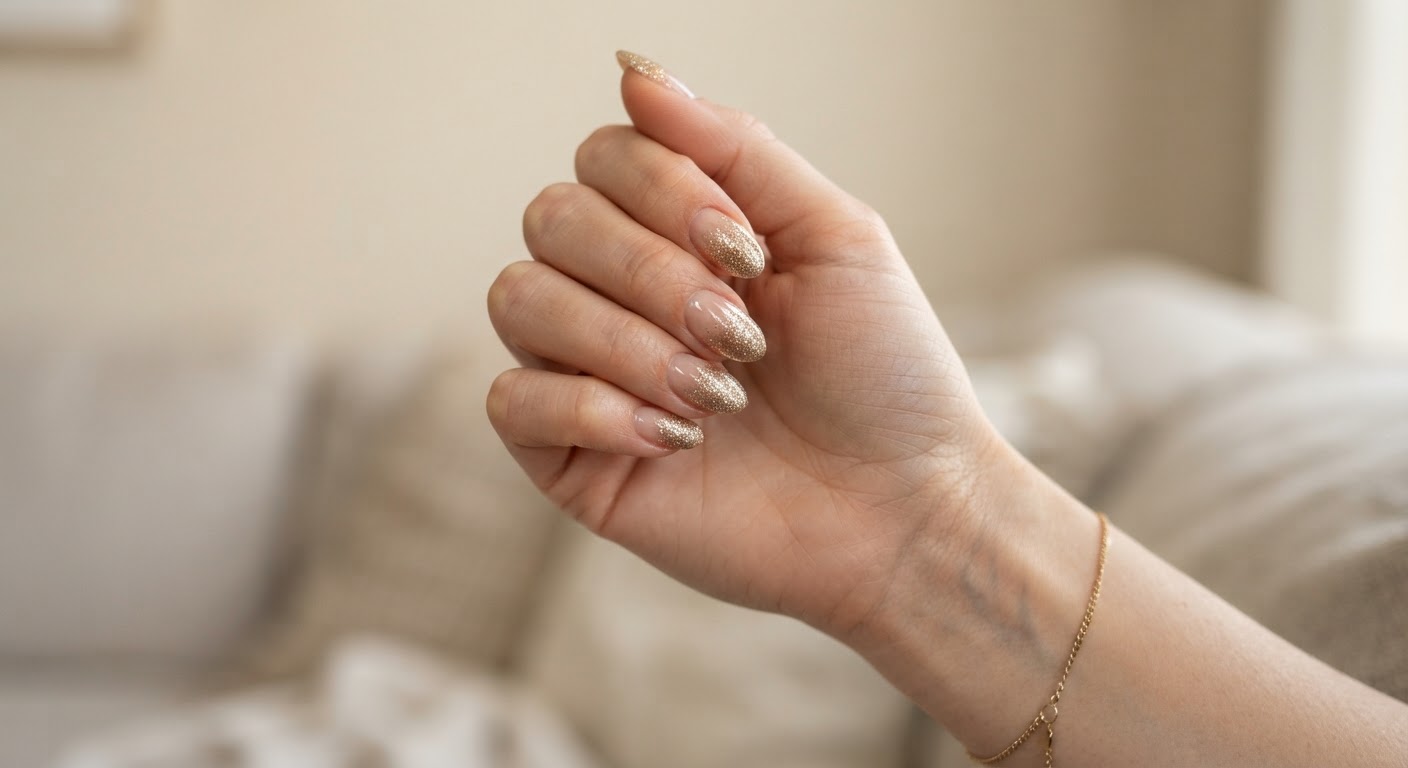
Gold glitter that builds from a sheer nude base into a dense, sparkling tip. Glitter ombre is usually done with a glitter gel rather than a sponge — layer it more heavily at the tip and fade it upward with a brush.
What to ask your nail tech for: "A gold glitter ombre, sheer at the base and dense at the tips."
| Polish | Shop |
|---|---|
| Gold glitter gel | Shop gold glitter gel |
| Sheer nude gel | Shop sheer nude gel |
| Glossy top coat | Shop gel top coat |
21. Silver Chrome Ombre
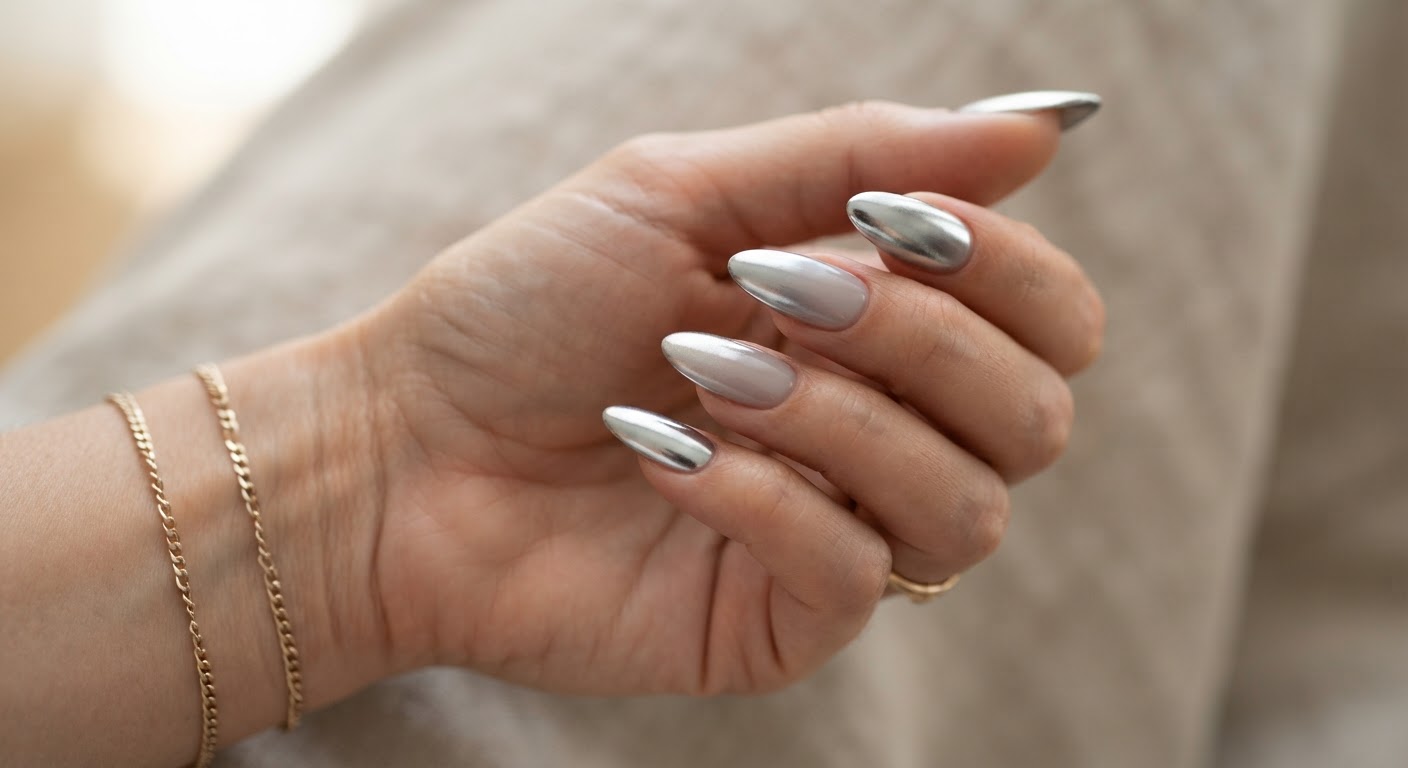
Mirror silver fading into a soft grey-nude base is the coolest, most futuristic ombre on the list. The chrome rub goes over a cured top coat, so the gradient is created first and the shine applied second.
What to ask your nail tech for: "A silver chrome ombre — metallic at the tips fading into grey nude, mirror finish."
| Polish | Shop |
|---|---|
| Silver chrome powder | Shop silver chrome |
| Grey nude gel | Shop grey nude gel |
| Glossy top coat | Shop gel top coat |
22. Velvet Cat-Eye Ombre
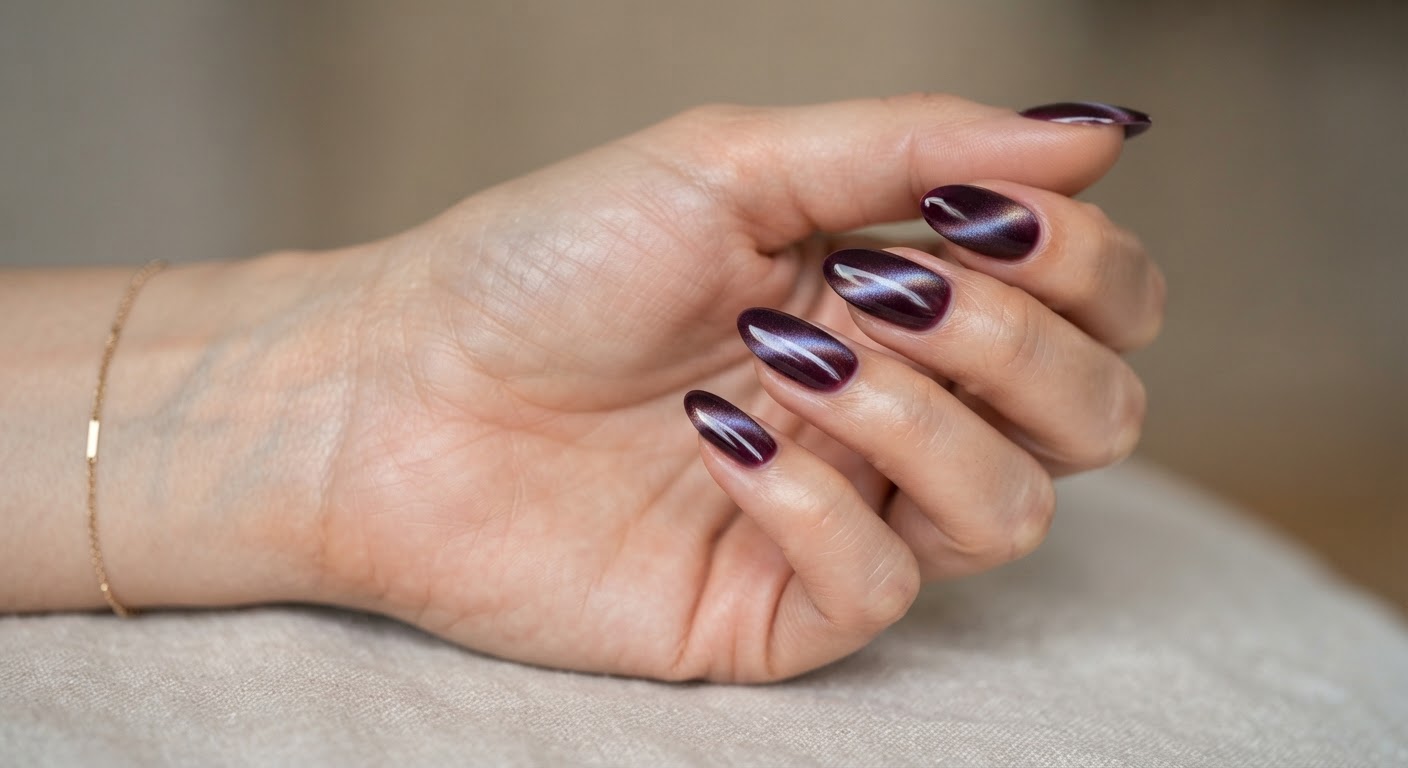
A dark plum magnetic cat-eye gel blended into a lighter base creates a gradient with a light beam running through it. It is the most dynamic ombre here, because the shimmer shifts as your hand moves.
What to ask your nail tech for: "A plum velvet cat-eye ombre, magnetic beam over a lighter base."
| Polish | Shop |
|---|---|
| Magnetic cat-eye gel | Shop magnetic gel |
| Plum gel | Shop plum gel |
| Glossy top coat | Shop gel top coat |
23. Matte Ombre
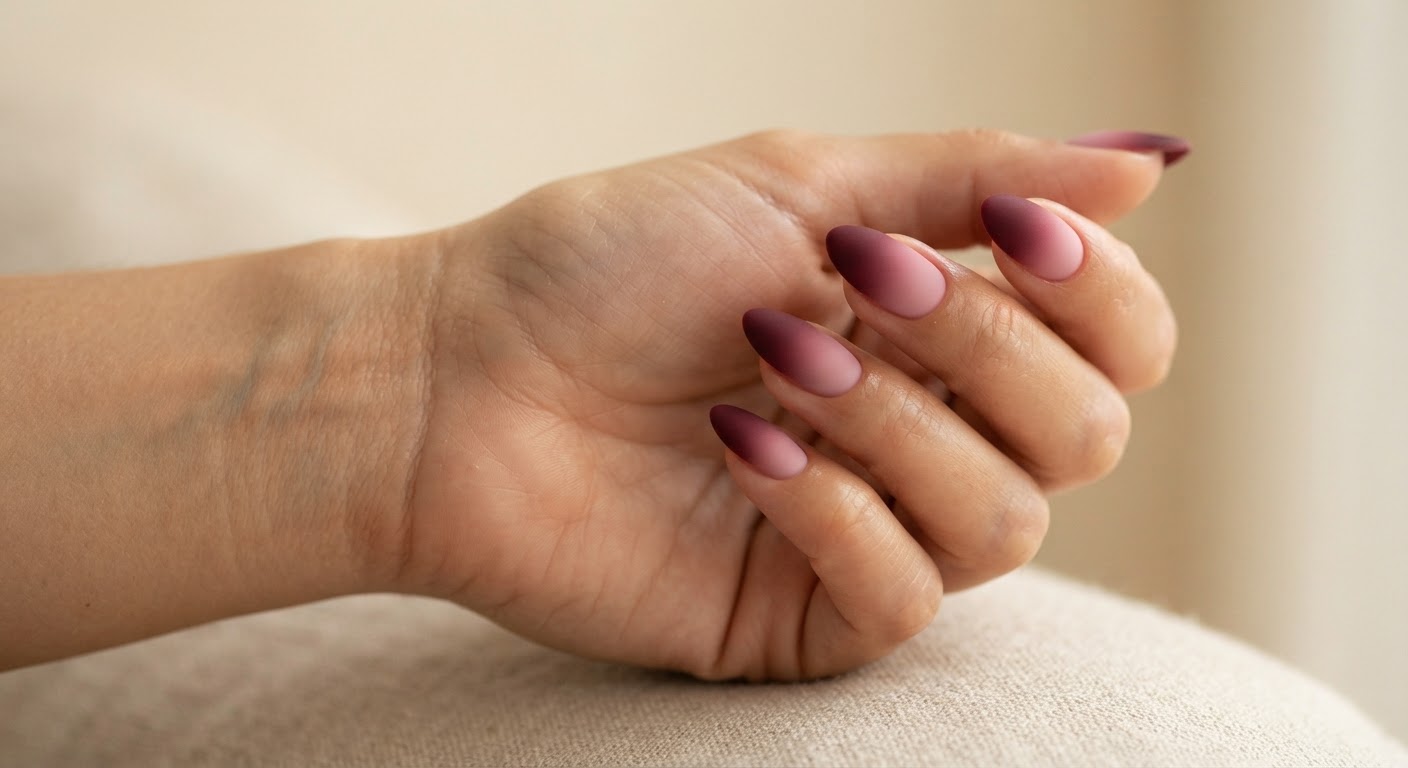
The same gradient, a completely different mood. A matte top coat turns pink-to-burgundy into something velvety and understated, and it photographs with a soft, almost fabric-like finish.
What to ask your nail tech for: "A pink to burgundy ombre with a matte top coat — no shine."
| Polish | Shop |
|---|---|
| Matte top coat | Shop matte top coat |
| Pink gel | Shop pink gel |
| Burgundy gel | Shop burgundy gel |
24. Holographic Ombre
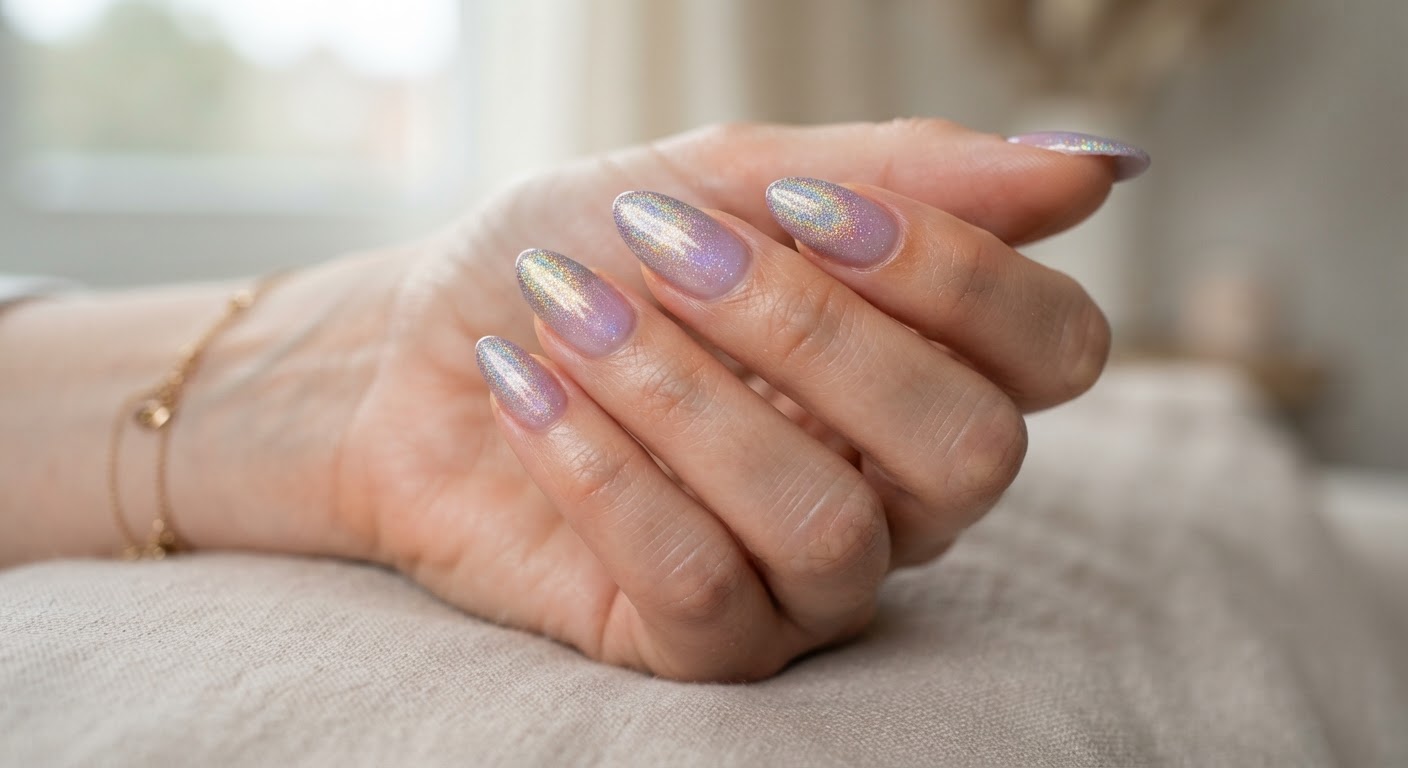
Fine holographic glitter fades from the tips into a sheer lilac base, throwing rainbow sparks in direct light. Unlike chrome, holo glitter keeps the gradient visible even when the light is flat.
What to ask your nail tech for: "A holographic glitter ombre over sheer lilac, glitter dense at the tips."
| Polish | Shop |
|---|---|
| Holographic glitter gel | Shop holo glitter gel |
| Lilac gel | Shop lilac gel |
| Glossy top coat | Shop gel top coat |
Modern and artistic ombre
25. Aura Ombre
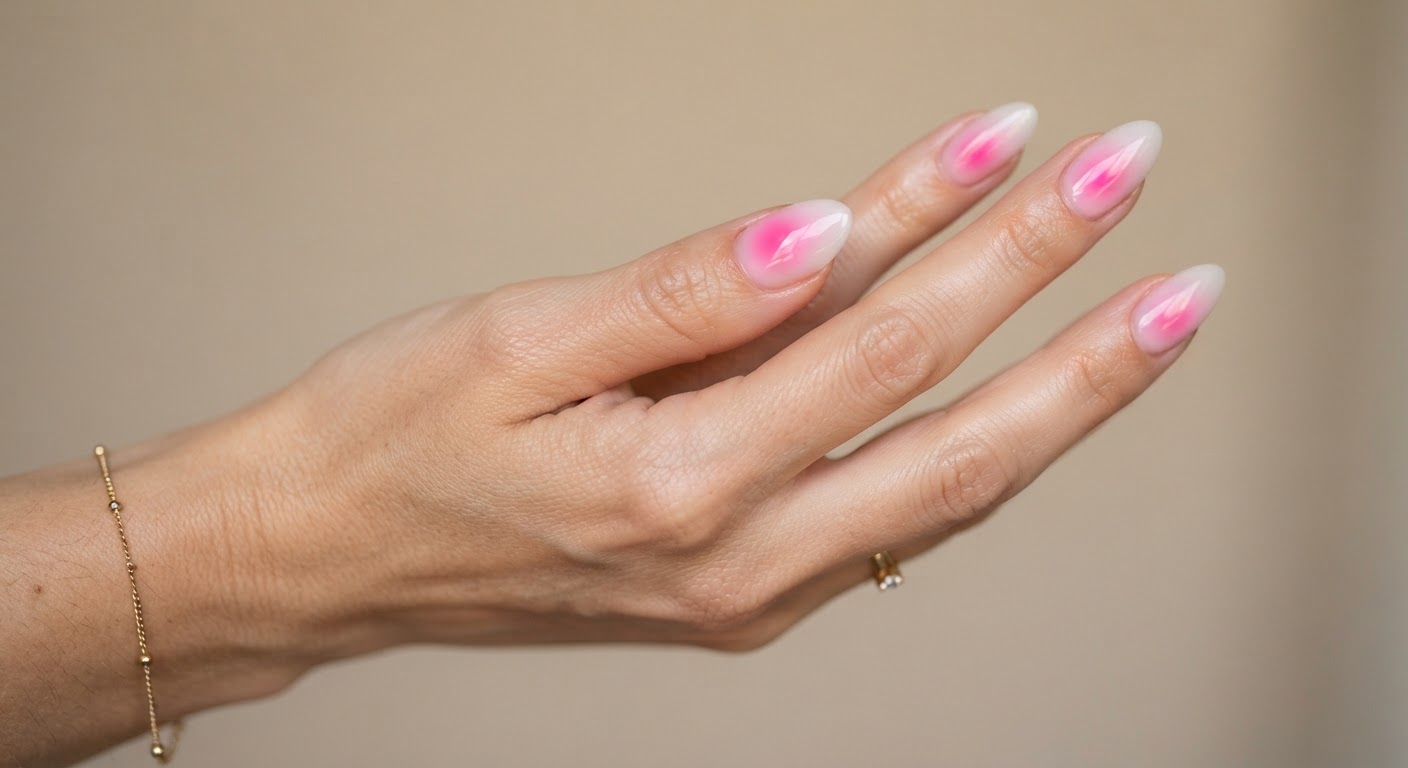
The aura nail is a centre-out ombre: bright pink blooming from the middle of the nail and dissolving into a milky edge. It is usually built with eyeshadow or pigment over a matte base, which gives the softest, most airbrushed edge of any method here.
What to ask your nail tech for: "A pink aura — milky white base with a pink glow in the centre of each nail, soft edges."
| Polish | Shop |
|---|---|
| Pink eyeshadow | Shop pink eyeshadow |
| Milky white gel | Shop milky white gel |
| Matte top coat | Shop matte top coat |
26. Watercolour Ombre
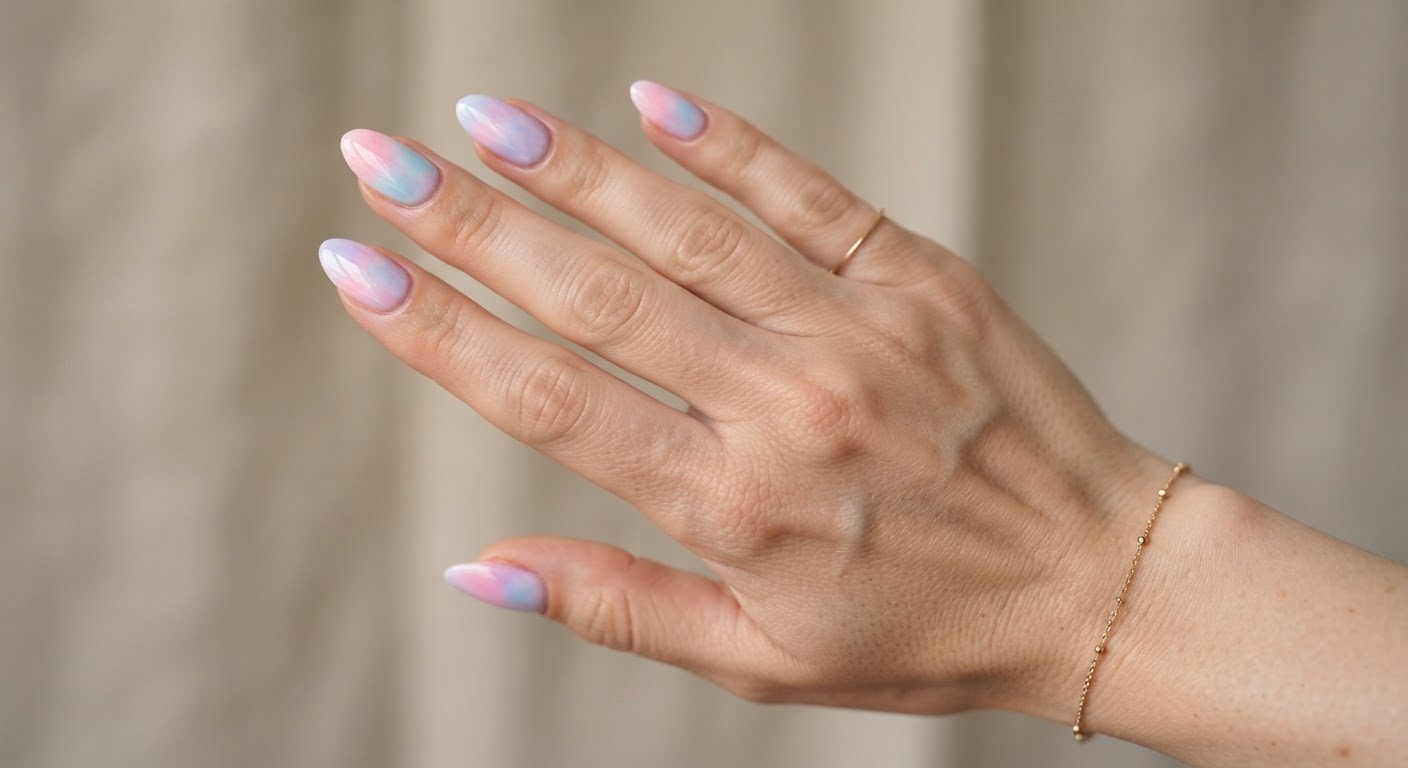
Pastel pink, blue and lilac blended so loosely they look like wet paint. A drop of clear gel or blooming gel on the nail lets the colours marble into each other, which is what separates a watercolour ombre from a tidy three-band fade.
What to ask your nail tech for: "A soft watercolour ombre — pastel pink, blue and lilac marbled together, no hard bands."
| Polish | Shop |
|---|---|
| Pastel gel set | Shop pastel gel set |
| Blooming gel | Shop blooming gel |
| Glossy top coat | Shop gel top coat |
27. Skittle Ombre
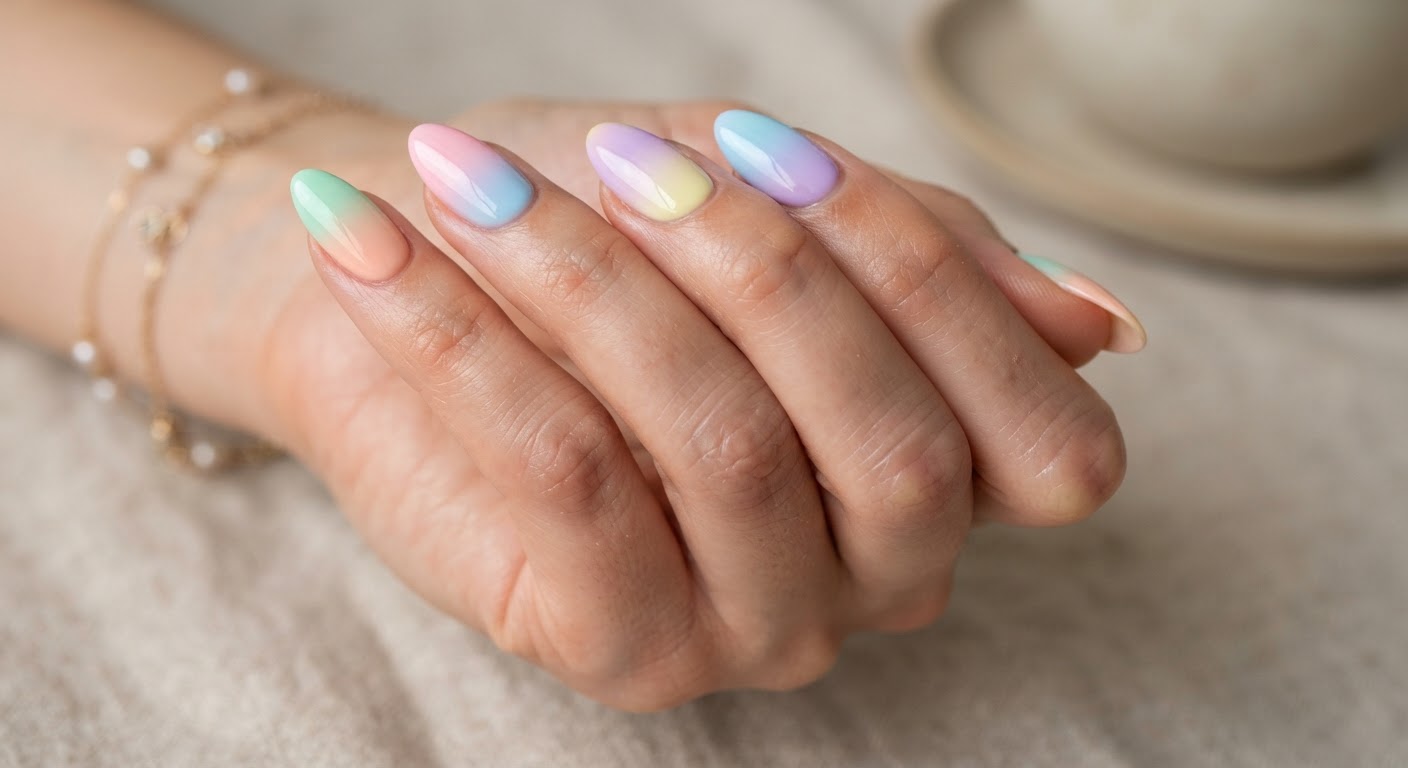
A skittle manicure paints each nail differently, and a skittle ombre gives every nail its own gradient — pink, lilac, blue, mint and peach — in a coordinated palette. It is the most playful way to wear the trend and a good use for a mixed gel set.
What to ask your nail tech for: "A skittle ombre — each nail a different pastel two-tone gradient in the same palette."
| Polish | Shop |
|---|---|
| Pastel gel set | Shop pastel gel set |
| Glossy top coat | Shop gel top coat |
28. Smoky Black Ombre
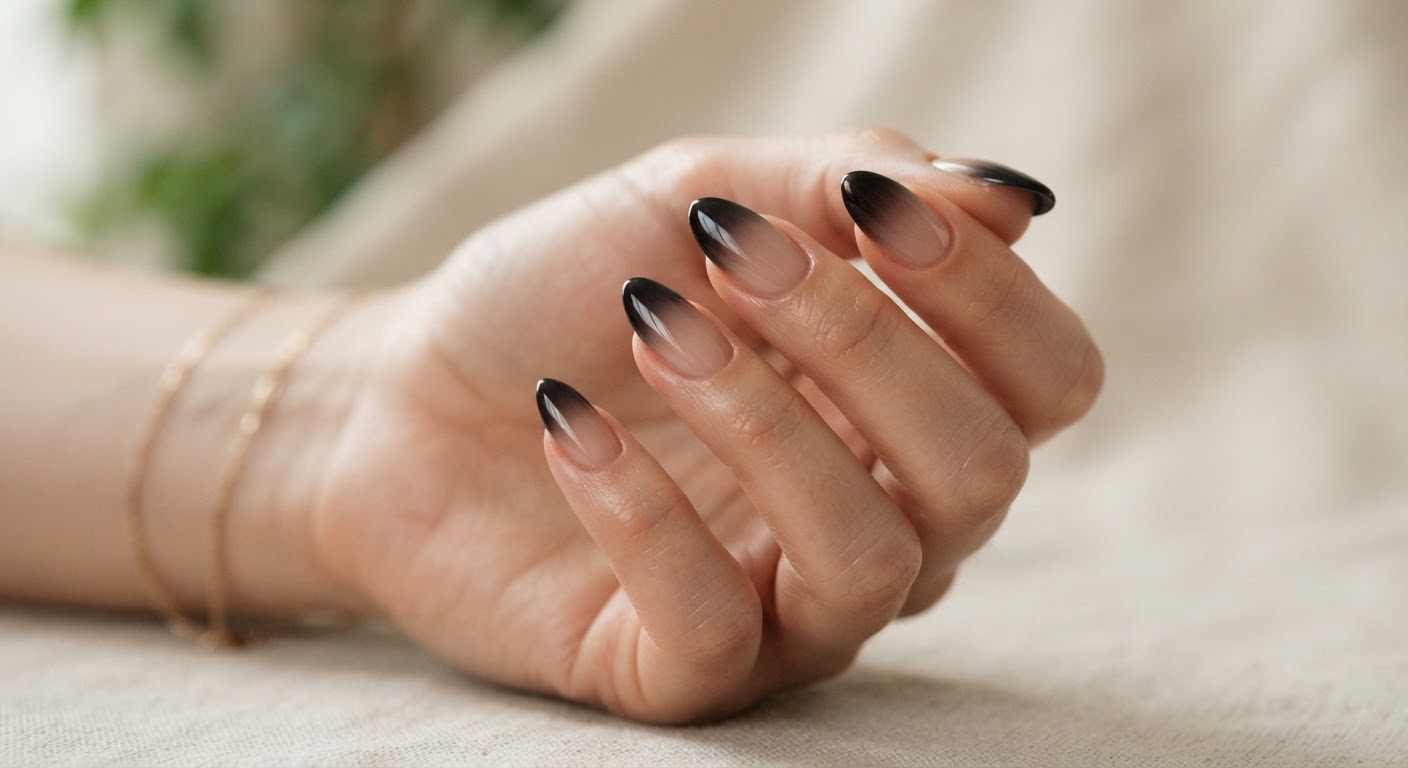
Sheer black fading into nude is the moodiest idea on the list — smoky rather than solid, so the nail keeps some translucency. It is a modern alternative to a solid black manicure and reads especially well on glossy almond shapes.
What to ask your nail tech for: "A smoky black ombre — sheer black at the tips fading into a nude base."
| Polish | Shop |
|---|---|
| Sheer black gel | Shop sheer black gel |
| Nude gel | Shop nude gel |
| Glossy top coat | Shop gel top coat |
29. Milky White to Clear Ombre
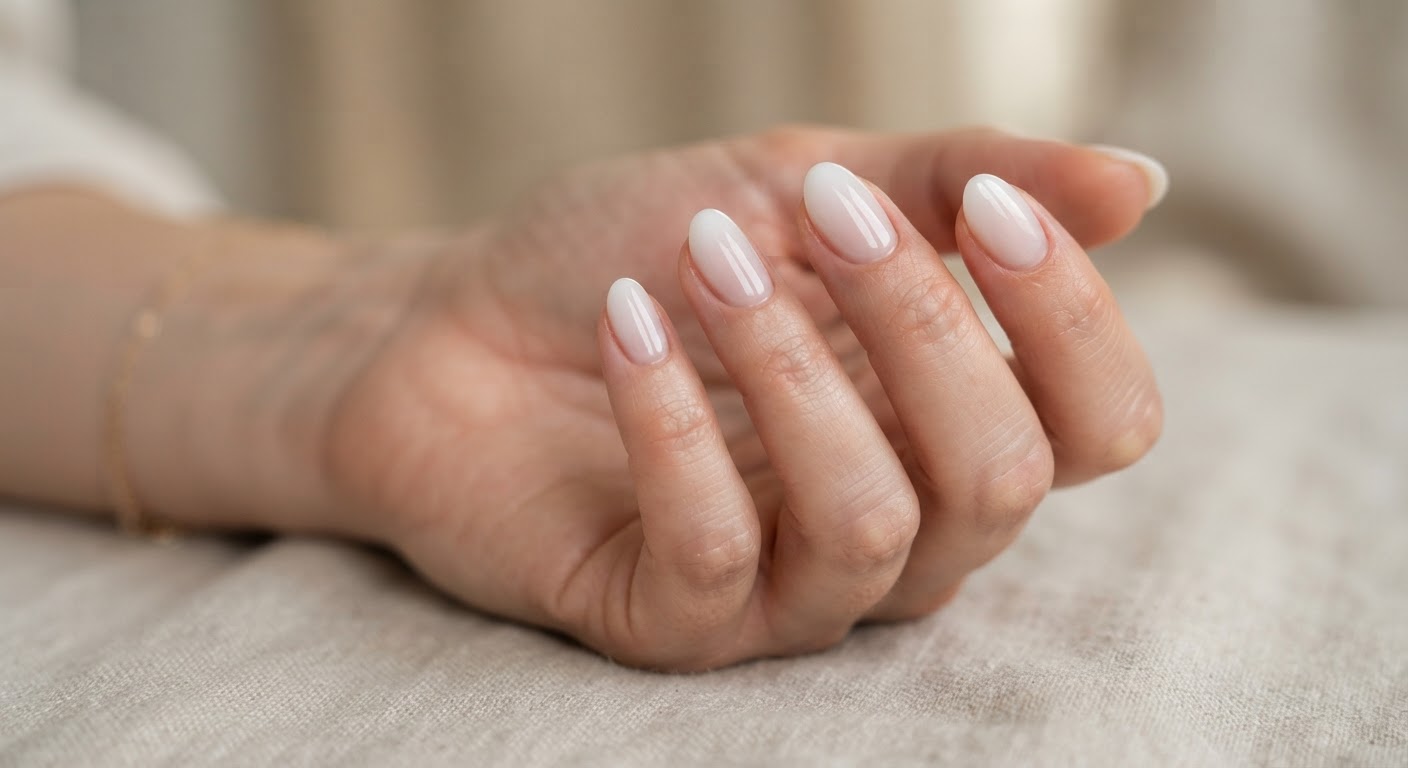
Milky white that fades into clear near the free edge looks like a sheer veil over the natural nail. It is the most minimal ombre possible, and it works beautifully on short almond and oval shapes.
What to ask your nail tech for: "A milky white to clear ombre, sheerest at the tips, high gloss."
| Polish | Shop |
|---|---|
| Milky white gel | Shop milky white gel |
| Clear builder gel | Shop clear builder gel |
| Glossy top coat | Shop gel top coat |
30. Rainbow Ombre
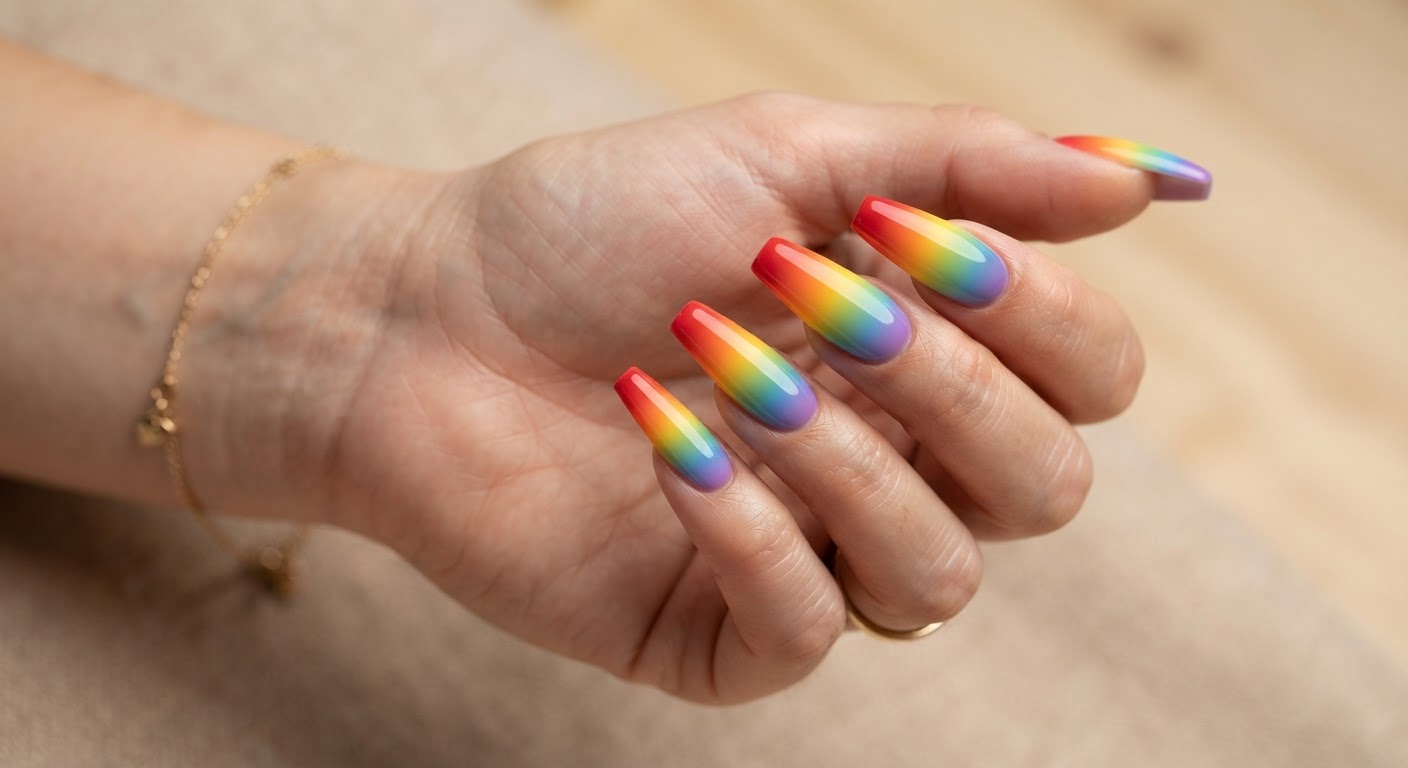
The maximalist finish: each nail carries its own rainbow gradient across red, orange, yellow, green, blue and violet. It takes a steady hand and a full colour set, but on a long coffin shape it is genuinely spectacular.
What to ask your nail tech for: "A rainbow ombre, one full spectrum gradient per nail, long coffin shape."
| Polish | Shop |
|---|---|
| Rainbow gel set | Shop rainbow gel set |
| Glossy top coat | Shop gel top coat |
Frequently asked questions about ombre nails
What are ombre nails?
Ombre nails are a gradient manicure: two or more colours blended across the nail so the eye reads one continuous fade instead of a hard line. "Ombré" is French for "shaded." The gradient can run vertically, horizontally, diagonally or from the centre outward, and it can be built with polish, gel, acrylic, dip powder or press-ons.
How do you do ombre nails at home?
The easiest method is the makeup sponge. Prep and base-coat the nail, paint two bands of polish side by side on a small sponge, then dab — don't drag — the sponge onto the nail in light bouncing motions. Build two or three thin passes, tidy the seam with a small brush, clean the skin with acetone, and seal with a glossy top coat. Use gel polish and a lamp if you want the set to last two to three weeks instead of one.
Can you do ombre nails without a sponge?
Yes. You can blend two polishes with an ombre brush and a drop of clear gel, use eyeshadow or pigment over a matte base for an airy aura effect, layer glitter gel more densely at the tip, or use a blooming gel to let the colours spread on their own. Airbrushing gives the smoothest result but is a salon technique.
Can you do ombre nails with gel polish?
Yes, and gel is the best option for longevity. Use the same sponge method as regular polish, curing each thin layer under a UV or LED lamp before adding the next. Work in thin layers and cure for the minimum recommended time between coats so the gel stays blendable. A no-wipe top coat gives the smoothest finish and the best surface if you want to add chrome.
What is the difference between ombre and baby boomer?
Baby boomer is a specific ombre: the pink-to-white French fade. Ombre is the broader term for any gradient, in any colour. A baby boomer is always an ombre, but an ombre is not always a baby boomer.
Do ombre nails work on short nails?
Yes — ombre is one of the most flattering designs for short nails. A vertical fade creates the illusion of a longer nail bed, and the soft transition means there is no small canvas fighting a complex design. Short almond and square shapes both work well.
How long do ombre nails last?
A gel ombre lasts about two to three weeks, a regular polish ombre five to seven days, and a dip or acrylic ombre two to four weeks. Press-ons last one to two weeks with glue. Daily cuticle oil, gloves for household chores and a top coat refresh all help a set reach the longer end of the range.
How much do ombre nails cost?
At a salon, ombre is usually a small upcharge over a solid colour. As a guide, a gel ombre runs roughly $45 to $75 in most US markets, with chrome, glitter or specialty finishes adding around $10 to $20. Prices vary widely by city and salon. At home, a press-on ombre set costs about $10 to $25, while a gel kit and lamp are a larger one-off purchase that pays off across multiple sets.
What nail shape is best for ombre?
Almond and oval shapes show a vertical gradient most naturally because the curve gives the fade more distance to travel. Square and coffin shapes give the gradient cleaner edges and a more graphic look. The best shape is the one you already like wearing — the gradient adapts.
For nail techs and salon owners: adding ombre to the menu
Ombre is one of the most reliable upcharges on a salon menu. It takes a few extra minutes, needs almost no extra stock beyond a second colour, and clients rebook it because the grow-out stays tidy. If you are building or refreshing an ombre service:
- Stock a range of coloured gels and nail polish so you can blend within a client's palette rather than mixing across brands
- Keep ombre brushes and sponges dedicated to blending — a clean, dry brush is the difference between a smooth fade and a stripey one
- Offer finish upgrades as add-ons: chrome powders, magnetic cat-eye gels, glitter and a matte top coat
- Use a properly rated manicure lamp and cure every layer fully — under-cured layers are the leading cause of lifting and of acrylate reactions
- Carry nail prep products, files and buffers so prep is consistent across every tech in the salon
- For longer-wearing colour ombres, consider powder-gel systems or coloured acrylics
- Add education on safe removal and aftercare so clients never pick a set off between appointments
Brands in the directory that supply the colour, gel and finishing products behind these sets include OPI, Light Elegance, Polish & Co, Glam and Glits and Dazzle Dry. If you offer ombre in your salon, add or update your listing so clients searching for a gradient manicure can find you.
Keep browsing nail guides
Ready to book or try one at home? Head back to the nail blog for more technique and inspiration guides, including French tip nails, chrome nails, cat eye nails, almond nails, gel nails, gel X nails, cute nails, fall nails and Halloween nails. You can also explore the full directory to find the gels, lamps, brushes and finishing products behind the looks you love.
As an Amazon Associate, Nails Industry Directory earns from qualifying purchases.