
Acrylic Nails: The Complete Guide to Application, Wear and Removal
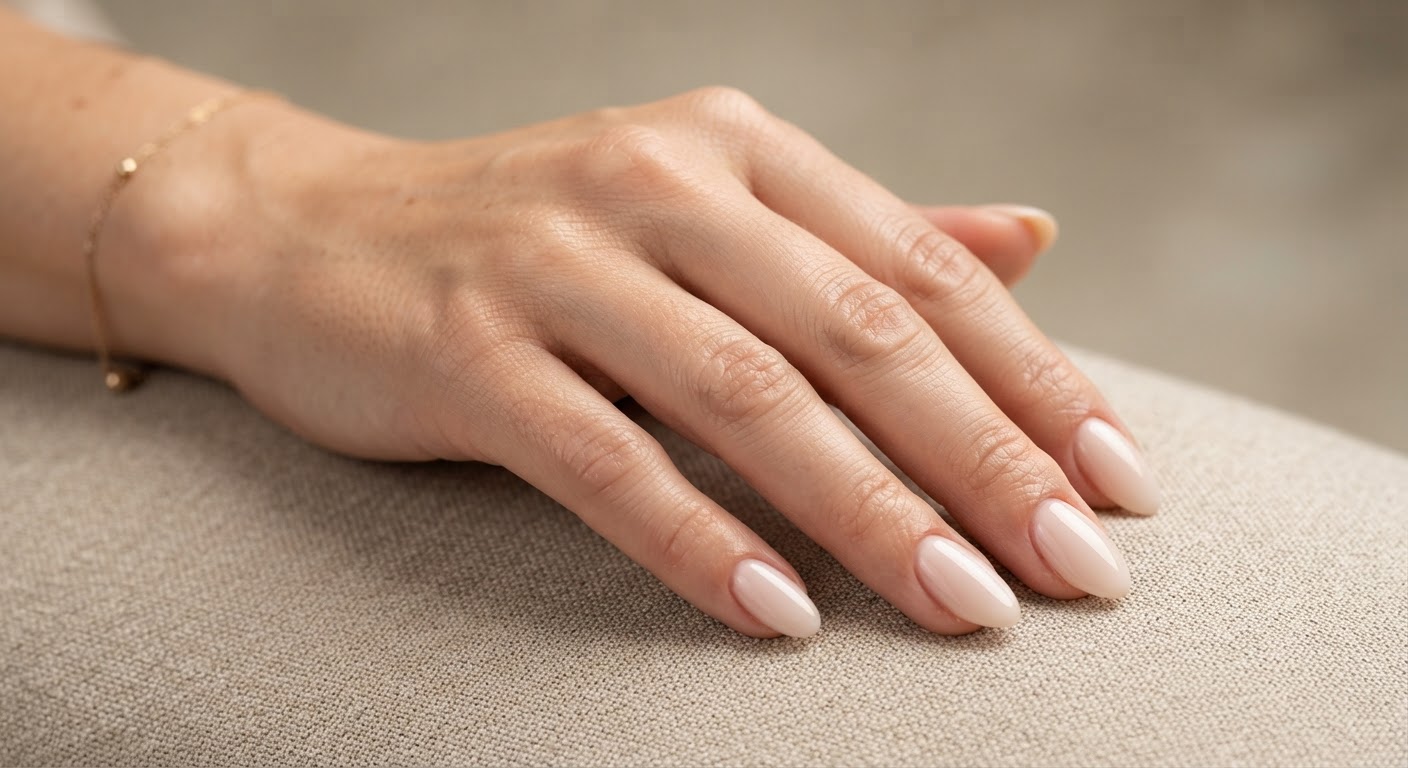
Acrylic nails are the workhorse of the nail industry: the hard, sculptable enhancement that can add length, correct a short or uneven nail, and hold a shape that softer products cannot. They are also the technique with the loudest reputation — blamed for thin nails, lifting, and the sharp smell of monomer. Most of that reputation comes down to how the set is applied, what it is made of, and how it is removed, not the idea of acrylic itself.
This guide explains what acrylic nails are and how the powder-and-liquid reaction works, how a set is built step by step, how long it lasts, how to remove it without wrecking the nail plate, what it costs, how it compares with gel and dip, and the safety issues worth knowing before you book. It finishes with six acrylic looks to request — from a milky nude almond to a chrome French — with the products that define each one.
What are acrylic nails?
Acrylic nails are an artificial nail enhancement made from a liquid monomer and a powder polymer. When the two are mixed, they form a soft, workable bead that is sculpted onto the natural nail or an extension. The bead then sets chemically in a few minutes into a hard, rigid plastic.
That is the key difference from gel: acrylic does not need a UV or LED lamp to set. The reaction starts the moment the liquid meets the powder. A lamp only comes into play if you finish the set with a gel top coat or gel color.
The powder is usually a polyethyl methacrylate (poly-EMA) polymer, and the liquid is usually ethyl methacrylate (EMA) monomer. The FDA describes artificial nails as acrylic polymers made by reacting acrylic monomers such as EMA with polymers, with traces of the monomer remaining after the product forms — which is why skin contact and full setting matter.
There are three common ways an acrylic set is built:
- Tip and overlay: a plastic nail tip is glued to the free edge, then acrylic is applied over the tip and natural nail to blend and strengthen it.
- Sculpted extension: a paper or reusable form is fitted under the free edge and the entire extension is built from acrylic.
- Overlay: acrylic is applied directly over the natural nail for strength and shape, with no added length.
"Acrylic nails" is also used loosely to mean any hard artificial nail. In a salon, it specifically means the monomer-and-powder system.
How acrylic nails work
Acrylic's strength comes from the ratio of liquid to powder and from the structure the technician builds, not from the brand name on the pot.
The chemistry, in plain terms
The powder supplies polymer granules; the liquid supplies monomer. Together they contain the initiator system that starts the reaction, plus stabilisers that keep the liquid from setting in the bottle. Mix them and the initiator starts a chain reaction: monomer molecules link together and the material hardens. The reaction is exothermic, meaning it gives off a little heat as it sets.
A few practical consequences follow from that:
- The mix ratio controls the result. A bead that is too wet shrinks more as it sets, can trap bubbles, and may lift; a bead that is too dry is stiff, cloudy, and prone to cracking. Manufacturers publish a working ratio for their system, and the brush should pick up a glossy bead that holds its shape without dripping.
- You work one nail at a time. Acrylic starts setting as soon as it is mixed. A bead that sits too long becomes unworkable.
- Thick does not mean strong. A thick, heavy layer can pop off more easily and puts more torque on the natural nail. Strength comes from a correct apex and a well-balanced stress area.
The structure of a well-built nail
A good acrylic nail is not an even coating. It has zones:
- A thin cuticle zone so the product does not flood living skin.
- A stress area over the middle of the nail, where the enhancement takes the most force.
- An apex — a subtle high point along the length that gives the nail its strength and a natural curve.
- A free edge that is thin enough to look elegant but capped so it does not chip.
This is why two technicians using the same powder and liquid can produce sets that wear completely differently. Application skill is the variable that matters most.
How it sticks
Acrylic bonds mechanically to the natural nail. Prep lightly etches the surface, then a dehydrator and/or primer prepares it for the monomer, depending on the system. It is not superglue, and it does not need a rough, deeply filed surface. In fact, aggressive filing is one of the main ways acrylic sets damage nails. The goal is a matte, clean plate — not a thinner one.
Your nail plate does not need to "breathe" through the acrylic. The real concern is what happens when the product lifts: water, shampoo, and debris can get trapped underneath, and that is what creates staining, odor, and bacterial problems.
Acrylic vs gel vs polygel vs dip
Acrylic is one option in a crowded category. The right choice depends on whether you want length, a natural feel, a fast service, or the least possible removal work.
| System | How it sets | Typical wear | Removal | Feel and best use |
|---|---|---|---|---|
| Acrylic | Monomer + powder, sets in minutes without a lamp | 2-3 weeks between fills; 6-8 weeks per set with maintenance | File off bulk, then soak in acetone | Hard, rigid, strongest for length and sculpted shapes |
| Gel polish | UV/LED-cured gel | 2-4 weeks | Soak off | Thin, glossy, flexible; best on natural nails |
| Hard gel / builder gel | UV/LED-cured gel | 2-4 weeks | File off (some soak-off builder gels dissolve) | Strong but less rigid than acrylic; good for overlays |
| Gel-X / soft gel tips | UV/LED-cured gel adhesive | 3-4 weeks | Soak off | Lightweight extensions with a gel feel |
| Dip powder | Resin and activator, no lamp | 2-4 weeks | Soak off | Fast, strong, slightly textured; less sculpting control |
| Polygel | UV/LED-cured hybrid | 3-4 weeks | File and soak | Lighter than acrylic, easier to control for some techs |
The short version: choose acrylic when you want maximum strength, length, and shape control. Choose gel nails when you want a thinner, glossier finish with less dust and a full soak-off. Choose Gel-X soft gel extensions when you want length without the rigidity of acrylic. Dip is the speed option; polygel sits between acrylic and gel.
What you need for acrylic nails
A professional acrylic setup is a system, not a single kit. These are the core pieces:
- Monomer and polymer from the same brand, plus a dappen dish for the liquid.
- An acrylic brush in a size that suits the nails you are building — smaller for natural nails, larger for long extensions.
- Nail forms for sculpting, or nail tips and glue for a tip-and-overlay set.
- Prep products: cuticle pusher, 180-grit file, buffer, lint-free wipes, dehydrator, and primer.
- Finishing tools: 180- and 240-grit files, a buffer, a dust brush, and optionally an electric file.
- Color and finish: colored acrylic powder, gel polish, or regular polish, plus a top coat.
- Removal and aftercare: 100% acetone, foil or removal clips, cotton pads, and cuticle oil.
- Safety basics: a dust mask, nitrile gloves, and good ventilation.
A beginner acrylic nail kit can be a cheap way to practice, but check what is inside. Budget kits vary widely: look at the monomer, the file grit, and the brush size before you buy. If you are building a kit piece by piece, start with a medium-speed EMA monomer, a clear or cover acrylic powder, and a brush designed for acrylic.
For a salon, the acrylics category is the starting point, with colored acrylics, forms for acrylic sculpting, nail tips, nail prep products, brushes, and electric files and accessories covering the rest of the service.
How to apply acrylic nails step by step
Acrylic is a skill, not a recipe. The steps below are the standard sequence a professional follows; the first few sets you do at home will not look like the ones on your saved board, and that is normal. Practise on tips or a practice finger before you work on your own hands.
Step 1: Plan the shape and length
Decide the shape before you mix anything. Acrylic can be filed into almost any silhouette, but the form or tip you choose sets the limits. Short square and squoval shapes are the most durable for everyday wear; almond and oval need a little more length; coffin and stiletto need a properly built apex or they will snap.
Step 2: Prep the natural nail
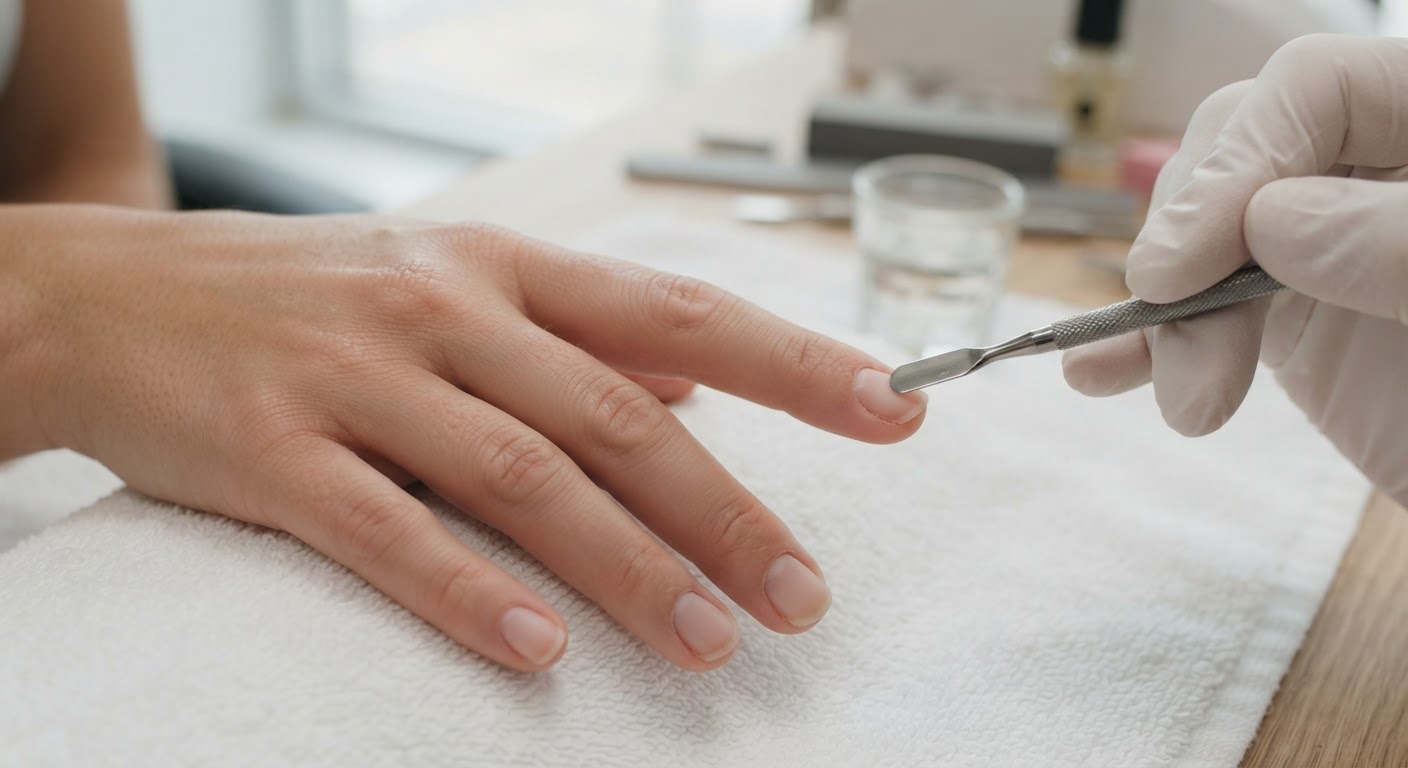
Clean hands, remove old polish, and push the cuticles back gently. Shorten the natural nail if it is long enough to interfere with the tip or form. Then remove the shine with a 180-grit file using light, sweeping strokes.
Stop when the surface is uniformly matte. Do not file into the nail plate to "make it rougher" — that thins the nail and creates the sensitivity people blame on acrylics. Dust off with a brush or lint-free wipe, apply the dehydrator, then the primer according to your system's instructions. Keep both off the skin.
Step 3: Fit a tip or form
For a tip-and-overlay set, size the tip so it fits the free edge without pinching or overhanging. Apply a small amount of nail glue to the tip, press it on, hold until set, cut it to length, and file the join smooth. For a sculpted set, fit the form under the free edge so it creates the length and curve you want, with no gaps at the sides.
Step 4: Mix the bead
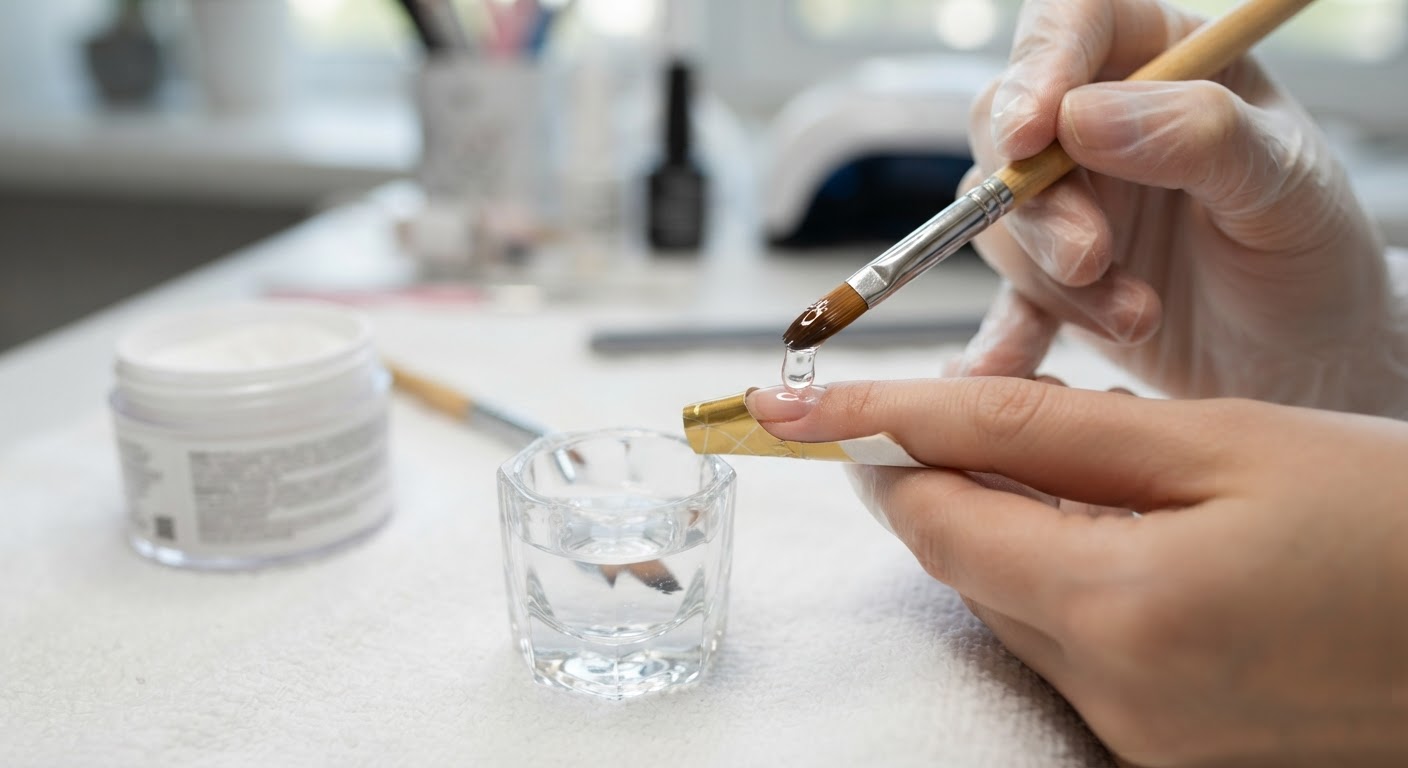
Pour monomer into the dappen dish. Dip the brush, press out air bubbles, and wipe the excess against the side of the dish. Pick up powder by drawing the brush through it until you have a small, glossy bead that holds its shape. Drain surplus liquid on a lint-free pad.
If the bead is stringy or dripping, it is too wet. If it looks crumbly or dry, it is too dry. Start again; a bad bead will not improve once it is on the nail.
Step 5: Apply the acrylic
Place the bead near the stress area and use the belly of the brush to press and pat it toward the free edge. Then work back toward the cuticle, keeping a hair's-breadth gap from the skin. Build the apex where the nail needs strength. For a long extension, use two or three smaller beads rather than one huge one, and work one nail at a time.
Keep the brush clean between passes by wiping it on a lint-free pad. If acrylic touches the cuticle or sidewalls, clean it away before it sets; flooding the skin is the most common cause of early lifting.
Step 6: Let it set
Leave the nail alone while the acrylic sets. Depending on the brand, ratio, and room temperature, that takes roughly two to five minutes. The surface will go from glossy to matte-ish and the nail will feel hard. Do not tap or press it while it is still soft. A slight warming sensation is normal as the reaction gives off heat; a sharp burning feeling can mean the bead was too thick or too wet. If it continues, remove the product and stop.
Step 7: Shape and refine
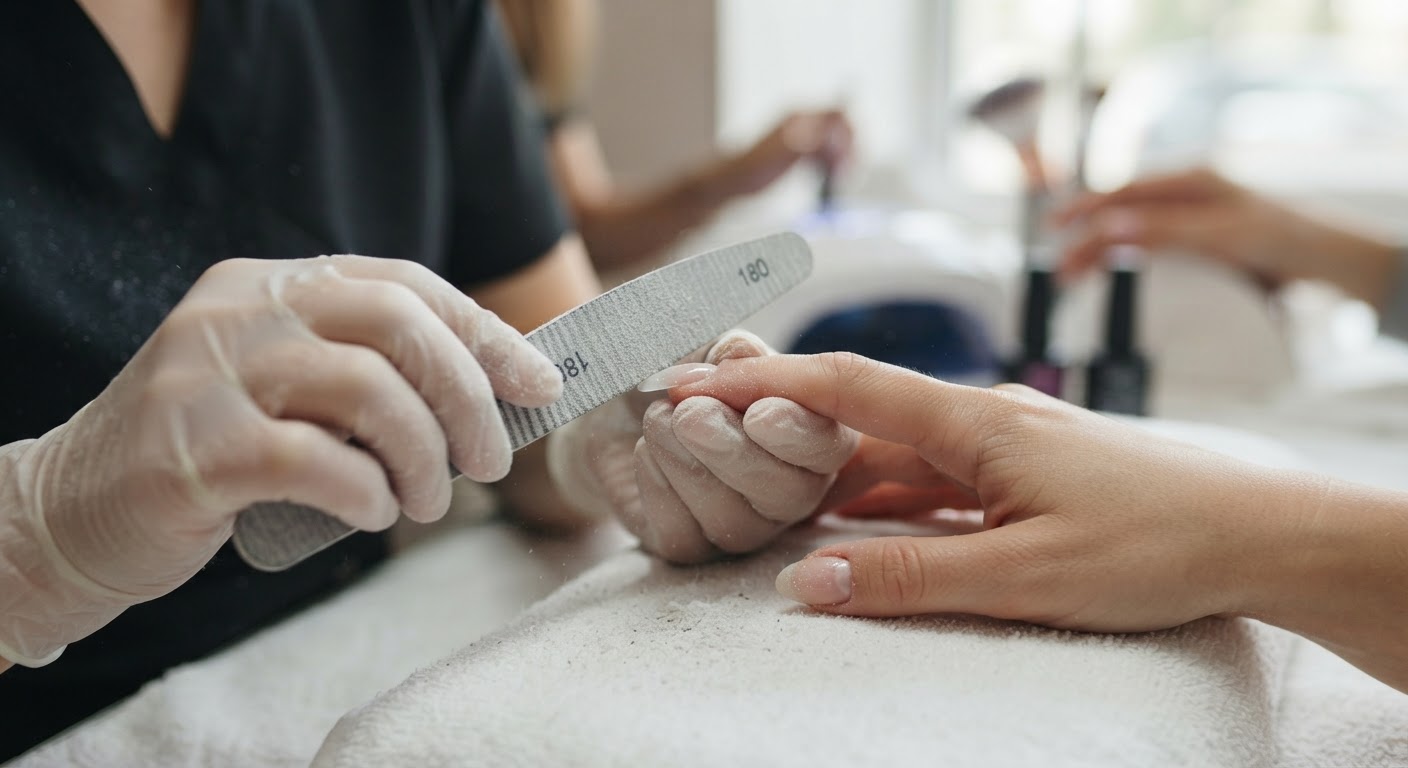
Once the acrylic is hard, file the sidewalls and free edge to your final shape. Check the surface for bumps, flat spots, and a lopsided apex, and refine with a 240-grit file. Buff to smooth the surface, then dust off thoroughly. If you are using an electric file, keep it on low speed and use light pressure; a drill is a shaping tool, not a way to remove bulk from the natural nail.
Step 8: Add color and seal
You can build the color into the acrylic using a colored powder, or apply gel polish or regular polish over a clear or cover set. Colored acrylic is more durable; gel polish gives you more shades and effects. Finish with a top coat. If you use a gel top coat, cure it under a UV/LED lamp for the time the manufacturer specifies. A regular top coat needs only to dry.
Step 9: Aftercare
Massage cuticle oil into the skin around each nail daily. Wear gloves for dishes, cleaning, and long hot baths. Do not use your nails to open cans, peel labels, or scrape things. Book a fill before the regrowth and lifting become obvious.
Watch: the basics of acrylic application
For a professional demonstration of the bead, the brush, and the build, this tutorial from Naio Nails walks through the foundation technique:
What goes wrong, and why
| Problem | Usual cause | Fix |
|---|---|---|
| Lifting at the cuticle | Cuticle left on the plate, acrylic flooded onto skin, oily surface, missed dehydrator | Re-prep carefully and keep the product off living skin |
| Bubbles | Bead too wet, brush whipped through the powder, air trapped in the dappen dish | Press bubbles out of the liquid and use a medium-wet bead |
| Cracking or snapping | No apex, too thin at the stress area, wrong powder-to-liquid ratio | Rebuild the structure with a correct apex and a slightly drier bead |
| Yellowing | Old or cheap monomer, staining from dark colors, top coat breakdown | Use fresh product from a reputable line and seal with a quality top coat |
| Ring of fire | Over-filing the natural nail at the sidewalls or cuticle | Stop at a matte surface and use a finer file |
| Green or dark discoloration | Moisture trapped under a lifted enhancement | See a professional; if there is pain, pus, or swelling, see a doctor |
How long do acrylic nails last?
Acrylic is one of the longest-wearing salon enhancements for most people, but "long-lasting" does not mean "leave it on indefinitely".
- Fills: every two to three weeks, as the natural nail grows out and the balance of the enhancement shifts.
- Full set with regular fills: commonly six to eight weeks, and sometimes longer for slow-growing nails, according to professional guidance. After that, most techs will want to remove and rebuild rather than keep filling the same set.
- Without maintenance: a set may look acceptable for three to five weeks, but the longer you leave it, the greater the risk of lifting, moisture getting underneath, and trauma to the natural nail.
What shortens wear, in rough order of impact: poor prep, flooding the cuticle, a bad mix ratio, a weak apex, using your nails as tools, and skipping fills. What extends it: a dry, clean nail plate, a well-built structure, daily cuticle oil, gloves for wet work, and booking the fill before the set starts to lift.
How to remove acrylic nails safely
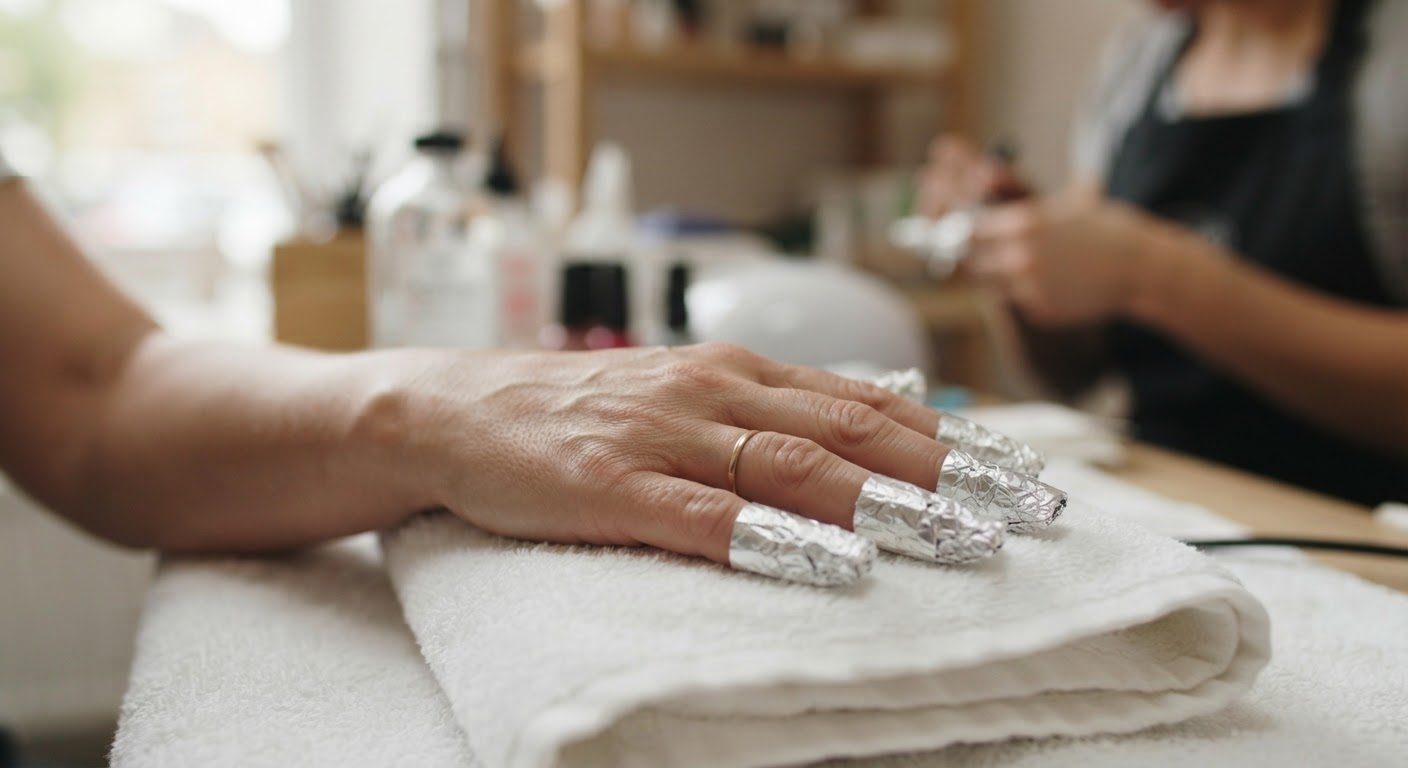
This is the part where most acrylic damage happens. Acrylic is removed by filing off the bulk and soaking the rest in acetone, not by prying, biting, or peeling. Forcing a set off takes layers of natural nail with it and can leave the plate thin and sensitive for months.
- Trim the length. Cut the free edge down with nail clippers so the acetone has less material to travel through.
- File off the bulk. Use a coarse file or an electric file on low speed to take the thickness down to a thin layer. Do not file into the natural nail. If you are not confident with a drill, leave this to a professional.
- Protect the skin. Apply a little cuticle oil or petroleum jelly around the nail to limit acetone exposure.
- Soak. Soak a cotton pad in 100% acetone, place it on the nail, and wrap with foil, or use an acetone removal clip. Leave for 10-20 minutes, checking at 10. Acetone is flammable and gives off strong fumes, so work in a ventilated room away from flames.
- Slide, do not scrape. Gently push the softened acrylic off with a wooden cuticle pusher. If it resists, re-wrap and soak again. Never lever it off.
- Buff and oil. Smooth away residue with a fine buffer, then massage cuticle oil into the nails and surrounding skin.
A bottle of pure acetone and a pack of foil removal wraps are the whole removal kit. Salons stock professional artificial nail removers and have the files to take bulk down safely. If the set is long, thick, or bonded with MMA, do not attempt it at home.
After removal, keep the nails short and oiled, and give the plate a break before the next enhancement if it feels thin. A good rule is to wait until the surface has grown out enough to feel firm again, rather than booking a new set immediately.
Advantages and drawbacks
Advantages
- The strongest common enhancement for adding length and sculpting a shape
- Holds almond, square, coffin, and stiletto shapes better than softer products
- No UV/LED lamp needed for the acrylic itself
- A durable canvas for color, chrome, ombré, and 3D nail art
- Fills can extend the life of a set for weeks
- Works well on short or uneven natural nails that need structure
Drawbacks
- Fumes and dust during application; proper ventilation matters
- Rigid feel that some people find heavy or less natural than gel
- Removal takes time and has to be done properly
- Fills every two to three weeks are part of the deal
- Over-filing, MMA, and forced removal are real risks
- Methacrylate allergy is possible, especially with repeated skin contact
- Not ideal for anyone whose job restricts artificial nails for hygiene reasons
How much do acrylic nails cost?
Salon prices vary widely by city, technician, length, and design. As a benchmark, Young Nails' current pricing guide puts a basic acrylic full set at around $60, a French set at from $80, fills at from $40, accent art at $5-$10 per nail, a repair at $10-$20, and a professional removal at from $30. Metro salons, luxury studios, and elaborate art can push those numbers much higher.
At home, a starter kit with monomer, powder, a brush, tips or forms, and basic tools typically runs $30-$100. That sounds like a bargain against a $60-$80 salon set, but factor in the practice time, the products you will replace, and the risk of a bad removal. DIY acrylic is worth it if you are prepared to learn the prep and structure properly; it is a false economy if you plan to pry the set off when you get bored.
One price warning: a full set that is dramatically cheaper than every other salon in the area is a reason to ask questions. Very cheap acrylic is sometimes MMA-based, which is harder, more difficult to remove, and associated with more nail damage. A reputable tech should be able to tell you the brand of monomer they use and whether it is EMA.
Safety: MMA, allergies, and nail damage
Acrylic has real safety considerations, and they are worth understanding before you book or buy a kit.
MMA vs EMA
MMA (methyl methacrylate) is the monomer that gave acrylic nails their bad reputation. It sets rock-hard, does not bond as flexibly to the nail plate, and is much harder to remove. The FDA moved 100% MMA monomer products off the market in the early 1970s after reports of nail damage and contact dermatitis. There is no specific federal regulation banning it in cosmetics today, but it is restricted in many US states, and professional manufacturers use EMA instead.
Signs that a salon may be using MMA include prices far below the local norm, an unusually strong fruity odor, a set that feels excessively hard, and removal that takes a very long time. Ask directly what monomer the salon uses. If the answer is vague, go elsewhere.
Methacrylate allergy
Even EMA can cause an allergic reaction in some people. The risk rises when uncured monomer touches the skin repeatedly. Symptoms include redness, itching, swelling, dryness, and pain around the nail bed. If that happens, have the product removed, stop using acrylics, and see a dermatologist. Do not try to "push through" a reaction; repeated exposure can make it worse and can cross-react with other methacrylate products, including some gels and glues.
Over-filing and infection
The natural nail plate is thin. Filing it aggressively during prep, or drilling into it during removal, causes thinning, sensitivity, and the reddish "ring of fire" around the cuticle. A good technician should be willing to show you how much they are filing and should stop at a matte surface.
Lifting is the other risk. Once an edge lifts, water and debris can get underneath, which can lead to staining, odor, or a bacterial infection. Pain, swelling, pus, or a dark green discoloration are reasons to see a doctor, not to cover the nail with another set.
Fumes and dust
Acrylic monomer has a strong odor, and filing creates fine dust. NIOSH and OSHA both flag nail salon chemicals and dust as occupational hazards for technicians. In a salon, expect ventilation and dust extraction; at home, work in a well-ventilated room, wear a dust mask when filing, and keep monomer away from skin and eyes. Monomer and acetone are flammable, so keep them away from open flames, pilot lights, and cigarettes, and store them sealed. If you are a tech, the ventilation systems category is where to source extraction equipment.
When acrylic is not the right choice
Skip acrylic — or get medical advice first — if you have an infected, inflamed, or recently injured nail, very thin or damaged nails, a known methacrylate allergy, or a medical condition that affects circulation or healing. Healthcare and food-service workers may also be restricted from wearing artificial nails for hand-hygiene reasons.
6 acrylic nail looks to try
Acrylic's advantage is that it can hold a shape. These six looks use that structure rather than fighting it, and each one lists the products that define the finish.
1. Milky Nude Almond
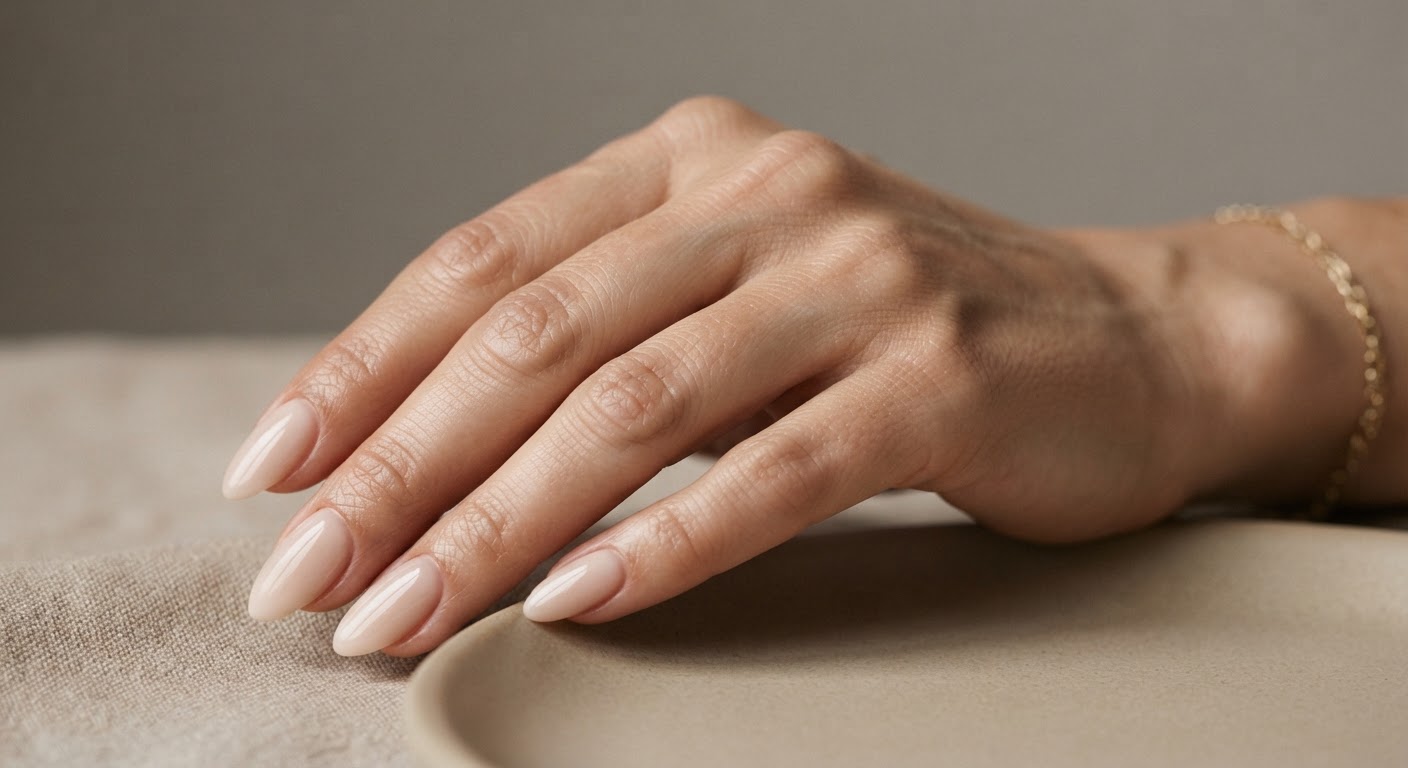
The clean-girl default, and the most versatile set on this list. A sheer milky nude powder over a clear or natural cover base looks like very good natural nails, with just enough opacity to blur imperfections. Medium almond keeps it elegant; a shorter squoval makes it more practical. It is also the easiest look to maintain, because regrowth is less obvious than with a dark color.
| Polish / product | Shop |
|---|---|
| Clear acrylic powder | Shop clear acrylic powder |
| Milky nude acrylic powder | Shop milky nude acrylic powder |
| Glossy top coat | Shop glossy top coat |
For more almond-specific shapes and lengths, see the almond nails guide.
2. Glossy Cherry Red, Short Square
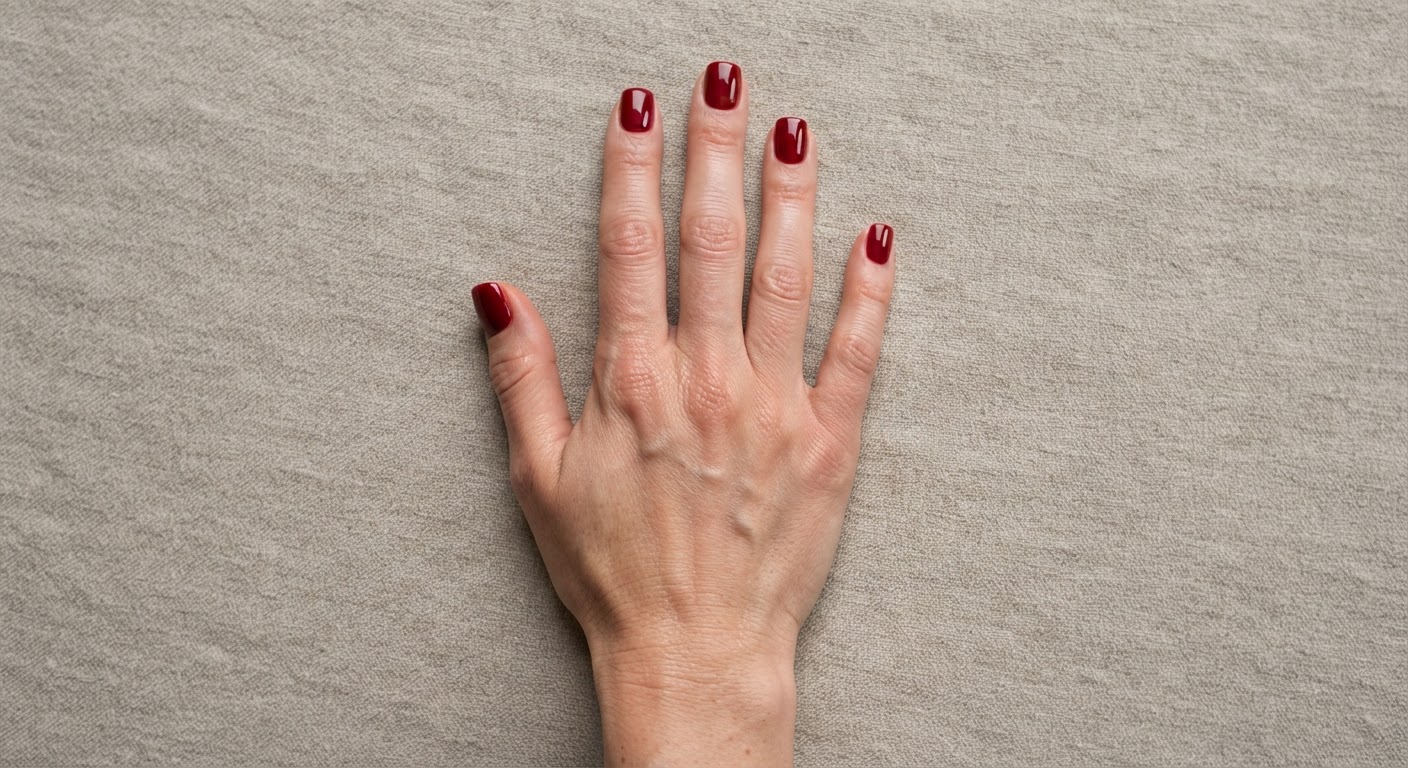
Cherry red is the color that keeps coming back: deeper and slightly cooler than a classic true red, with enough shine to read almost glassy. On a short, softly squared acrylic set it is low-maintenance, strong, and flattering on every skin tone. Ask for a short square or squoval with a thin free edge and a high-gloss top coat.
| Polish / product | Shop |
|---|---|
| Cherry red acrylic powder | Shop cherry red acrylic powder |
| Clear acrylic powder | Shop clear acrylic powder |
| Glossy top coat | Shop glossy top coat |
3. Chrome French Almond
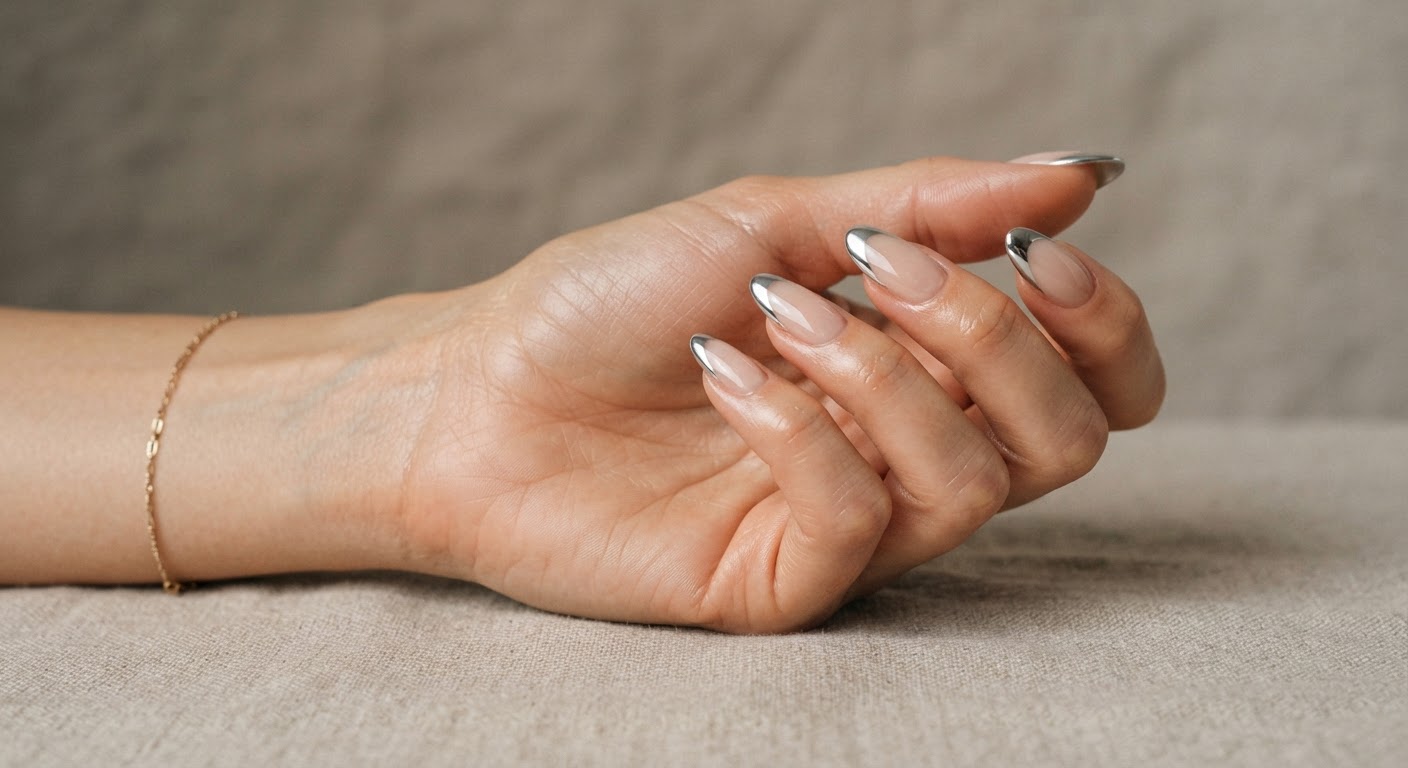
A French tip is the classic way to make a set look longer, and chrome is the finish that makes it look modern. The base is a sheer nude acrylic; the tip is built in white, then a silver chrome powder is burnished over a tacky no-wipe top coat. The result is a mirror tip rather than a painted line. It is a strong look for a wedding, a party, or any set you want to photograph.
| Polish / product | Shop |
|---|---|
| Sheer nude acrylic powder | Shop sheer nude acrylic powder |
| White acrylic powder | Shop white acrylic powder |
| Silver chrome powder | Shop silver chrome powder |
| No-wipe gel top coat | Shop no-wipe top coat |
| Glossy top coat | Shop glossy top coat |
Both the chrome nails guide and the French tip nails guide go deeper on the technique behind this one.
4. Espresso Ombré Coffin
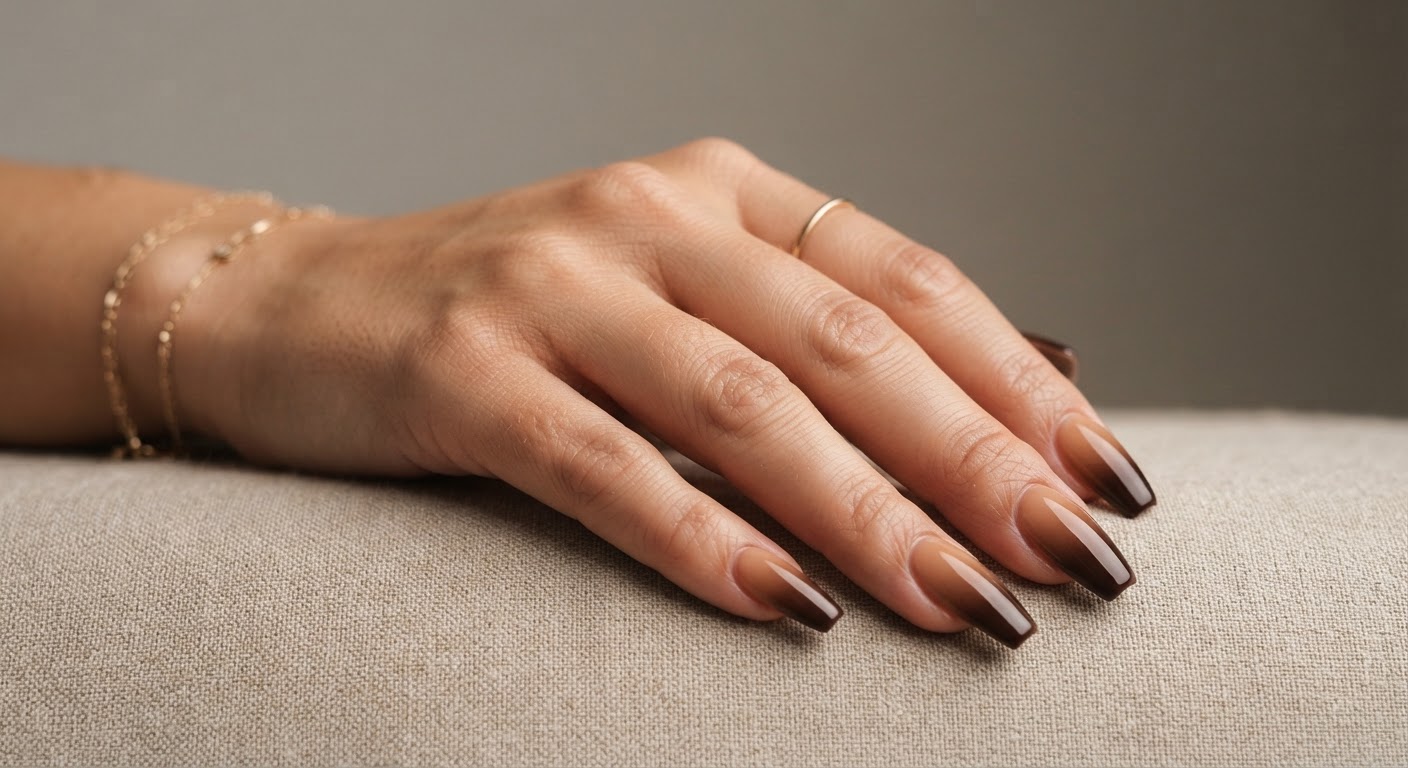
Espresso brown faded into a warm caramel nude is the grown-up ombré: soft enough for everyday, rich enough to feel autumnal. On a long coffin shape, the vertical gradient elongates the hand. The effect is built by blending two powders while the acrylic is still workable, or by airbrushing the gradient over a cured set. It pairs naturally with the fall nail trends and the ombre nails guide.
| Polish / product | Shop |
|---|---|
| Espresso brown acrylic powder | Shop espresso acrylic powder |
| Caramel nude acrylic powder | Shop caramel nude acrylic powder |
| Clear acrylic powder | Shop clear acrylic powder |
| Glossy top coat | Shop glossy top coat |
5. Plum Velvet Cat-Eye
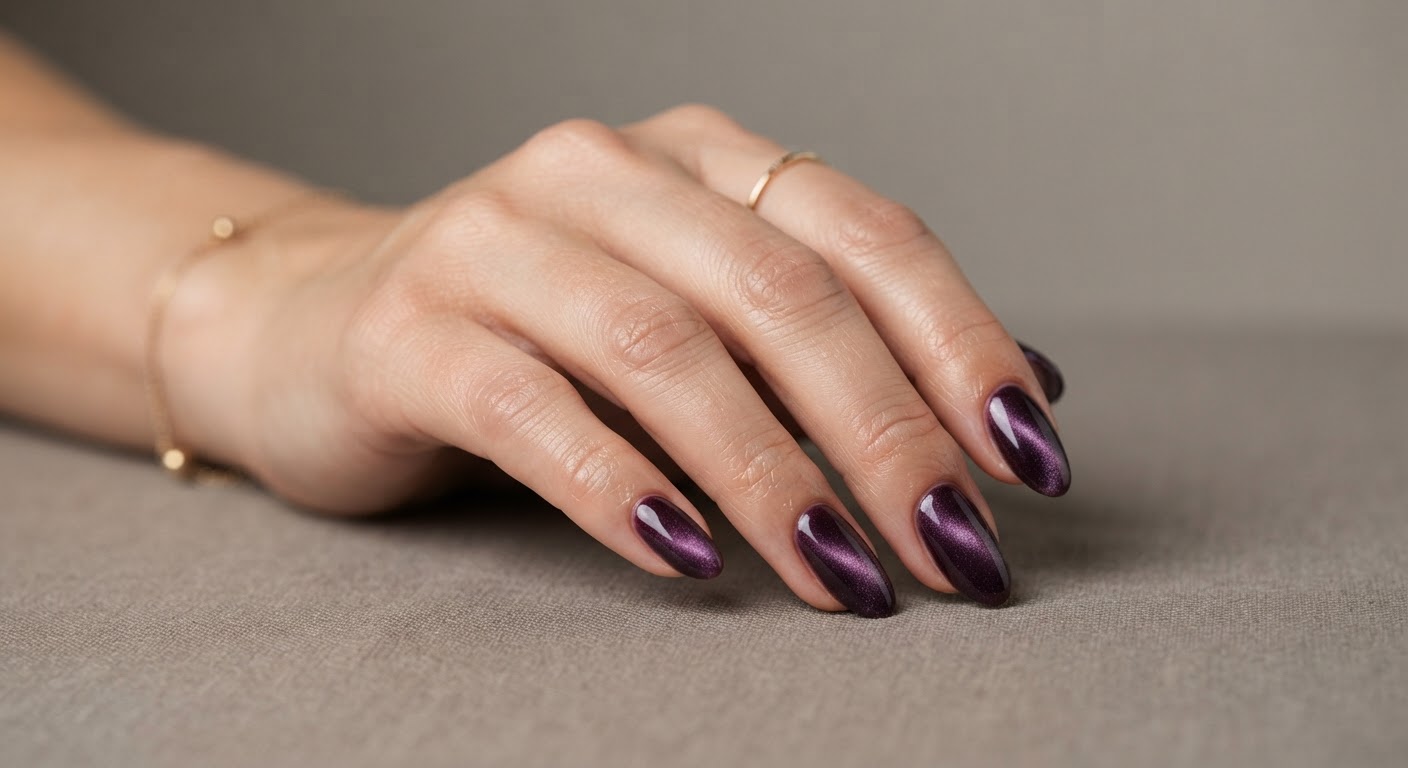
A cat-eye is technically a gel finish, not an acrylic one — but an acrylic base is a strong foundation for it. Build a short-to-medium almond in a deep plum or black, then apply a magnetic cat-eye gel and hold a cat-eye magnet over the wet gel to pull the shimmer into a soft velvet band. The effect shifts as your hand moves, which is why it photographs so well.
| Polish / product | Shop |
|---|---|
| Plum cat-eye gel | Shop plum cat-eye gel |
| Black gel base | Shop black gel polish |
| Cat-eye magnet | Shop cat-eye magnet |
| Glossy top coat | Shop glossy top coat |
The full technique, including the different magnet patterns, is in the cat eye nails guide.
6. Matte Black Coffin
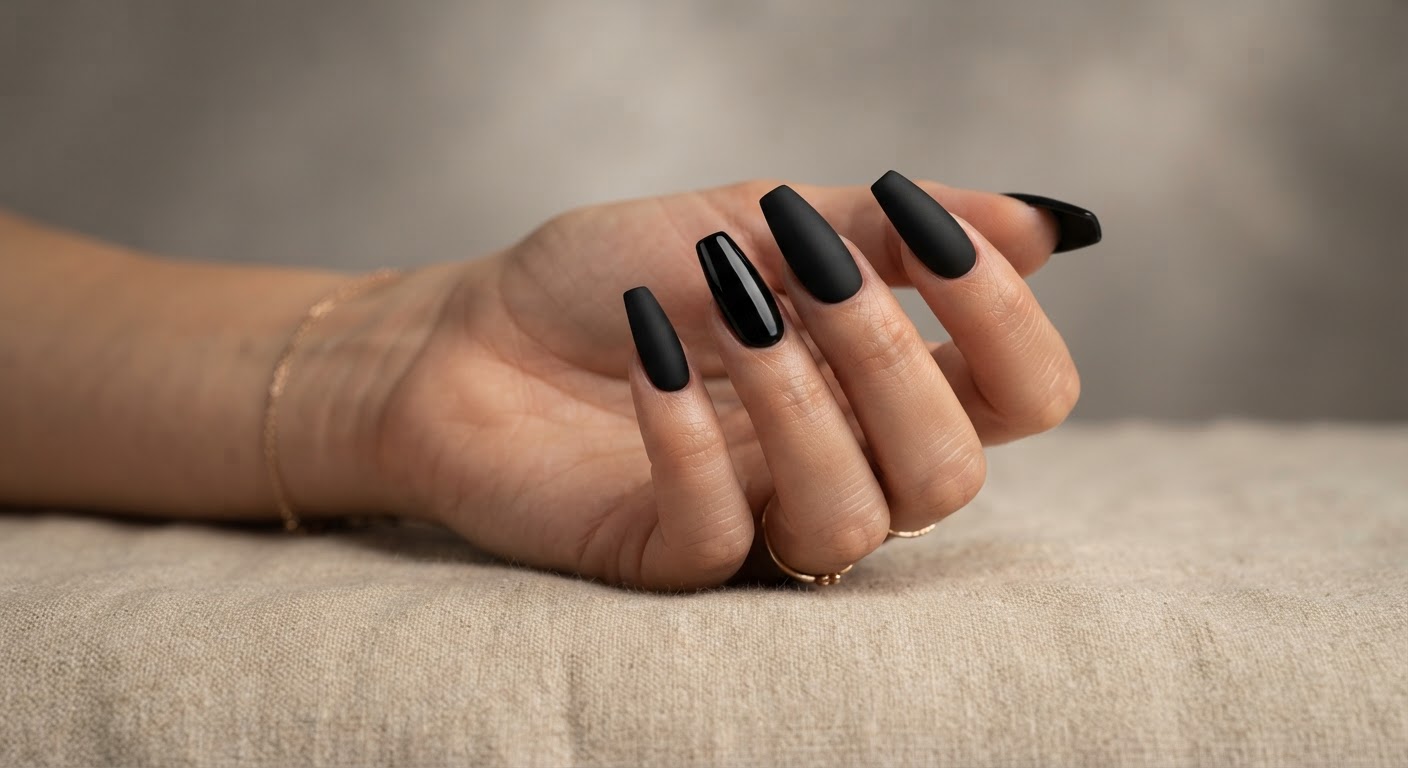
Matte black is the editorial option: severe, sculptural, and surprisingly wearable when the shape is clean. A long coffin or almond set in black, sealed with a matte top coat, looks expensive; one glossy accent nail adds contrast without turning it into nail art. It is the look to book when you want a set that reads as part of an outfit rather than a color choice.
| Polish / product | Shop |
|---|---|
| Black acrylic powder | Shop black acrylic powder |
| Matte top coat | Shop matte top coat |
| Glossy top coat | Shop glossy top coat |
If you like the contrast, the cute nails gallery has more ideas for mixing finishes and accents.
Frequently asked questions about acrylic nails
What are acrylic nails made of?
A liquid monomer (usually ethyl methacrylate) and a powder polymer (usually polyethyl methacrylate). Mixed together, they form a bead that sets hard in minutes without a lamp.
How long do acrylic nails last?
Plan on a fill every two to three weeks. With regular fills, a set commonly lasts six to eight weeks before it should be removed and rebuilt.
Are acrylic nails bad for your natural nails?
The product itself is not inherently destructive; the damage comes from over-filing, MMA-based products, lifting, and forced removal. Applied and removed correctly, acrylic can be worn long-term with healthy nails underneath.
Acrylic vs gel: which is better?
Acrylic is stronger and better for length and sculpted shapes. Gel is thinner, glossier, and fully soak-off. Neither is universally better — it depends on your nails, your lifestyle, and how much maintenance you want.
Do acrylic nails need a UV lamp?
No. The acrylic sets chemically. A lamp is only needed if you finish with a gel top coat or gel color.
Can I do acrylic nails at home?
Yes, but expect a learning curve. Prep, mix ratio, and structure are the hard parts, and a bad removal can do more damage than a bad application. Practise on tips first.
Why do my acrylic nails lift?
The usual causes are cuticle left on the nail plate, acrylic flooded onto the skin, an oily or damp surface, a missed prep step, or a bead that was too wet. Fix the prep and the ratio before blaming the powder.
Can you paint over acrylic nails?
Yes. Gel polish, regular polish, chrome powder, and nail art all work over a cured acrylic set. Gel finishes need a lamp; regular polish does not.
Can you remove acrylic nails at home?
Yes, if the set is not too thick or long. File off the bulk, soak in 100% acetone for 10-20 minutes, and gently push the softened product off. Never pry or peel. If the set is thick, painful, or MMA-based, see a professional.
How much do acrylic nails cost?
A basic salon full set starts around $60 in the US, with French, art, fills, repairs, and removal adding to the total. At-home kits run roughly $30-$100.
Can you get acrylics on short nails?
Yes. A short acrylic overlay can add strength and shape without much length. Short square and squoval sets are often more durable than long ones because they catch on less.
Can you shower or swim with acrylic nails?
Yes. The acrylic is fully set and waterproof. Wear gloves for long hot-water exposure, and dry carefully around the cuticles, because moisture trapped under a lifted edge is what causes problems.
What is MMA, and why should I avoid it?
MMA is methyl methacrylate, a monomer that sets harder and less flexibly than EMA and is much harder to remove. It is restricted in many states and associated with nail damage and allergic reactions. Ask your salon what monomer it uses.
For nail techs and salon owners
Acrylic remains a core salon service, and the clients who love it are loyal. A few operational basics protect both the service and the reputation:
- Choose one system and learn it properly. Monomer and powder are formulated to work together. Mixing brands can change the set time, the color, and the adhesion.
- Stock EMA, not MMA. Keep the SDS for every monomer on hand and be ready to answer client questions.
- Invest in extraction and ventilation. Dust and fumes are the occupational hazard of this service; ventilation systems and a salon vacuum are not optional in a busy salon.
- Carry the full service, not just the full set. Fills, repairs, safe removal, and aftercare retail are what keep clients coming back.
- Train on prep and removal. Most complaints about acrylic damage trace back to over-filing or forced removal, not the product.
Professional acrylic lines in the directory worth knowing include NSI and its Attraction Acrylic System, OPI, CND, en Vogue Sculptured Nail Systems, and Glam and Glits for colored acrylics. If you supply monomer, powder, forms, tips, or equipment, add your company so techs can find you.
Keep browsing nail guides
Whether you are booking your first full set or restocking a salon, the nail blog has more technique and inspiration: gel nails for the softer alternative, Gel-X for lightweight extensions, almond nails and French tips for shape and classic detail, and fall nails for seasonal color. You can also browse the full directory to find the acrylics, tools, and suppliers behind the set.
Sources and further reading
- FDA: Nail Care Products
- OSHA: Health Hazards in Nail Salons
- NIOSH: Controlling Chemical Hazards During the Application of Artificial Fingernails
- Harper's Bazaar: The Beginner's Guide to Acrylic Nails
- Cosmopolitan UK: How long do acrylic nails last?
- Naio Nails: Beginner's Guide to Applying Acrylic Nails
- Young Nails: Acrylic Nails Cost
As an Amazon Associate, Nails Industry Directory earns from qualifying purchases.